Tuesday, March 17, 2015

Lucky Charm

HAPPY St. Patrick's Day!!!!! Are you wearing green today? When I was little the thing to do in school was pinch the person NOT wearing green. Good thing I have green eyes cause sometimes I'd just forget!!! OUCH, lol!

Here's the last card using a pre made cut apart panel. Again, I kept it to a minimum and let the cut apart panel be the focal point. All I added was 4 punched hearts that I turned into a clover with a sliver of cardstock for the stem.

I hope you've enjoyed my examples of how I use one of those 12 X 12 cut apart papers and I hope you won't pass up one again because you have no clue what to do with it ;)

Friday, March 13, 2015

Top O' The Morning To You

One of the things I love about my local paper crafty store that the big box guys don't do is she buys the "whole collection" when getting patterned paper into the store. Weather you like My Mind's Eye, Bo-Bunny, Authintique or Graphic 45...etc.,when these manufactures make a paper there's ALWAYS several in that particular line that all match perfectly together. With that being said, it makes it super easy to use these cut a parts. Even the reverse side of the cut a part page can have a fun or pretty pattern.

 For this card I chose a panel from the cut apart, 2 matching papers from the same line and 2 colors of solid cardstock (a light and a dark green). Again, I kept it simple, I just die cut a panel of cardstock and laid it over the patterned paper, added a little flag and then added a little bling...easy peasy!! ;)


Wednesday, March 11, 2015

Irish Blessing

Hi everyone!! Top of the Mornin' to ya (hehehe)! I just HAD to say it what with St. Patrick’s day being here and all. ;)  I have a couple of cute St. Patty Day cards that I made as store samples for The Stamp Pad to share with you over the next few days. 

We've all seen the 12 X 12 paper that has several panels that you can cut apart, right? Do you normally pass them up because you aren't sure what to do with them? My 3 St. Patrick's day cards came from one of those cut apart type pages....


They are fairly easy to work with, just let them be your focal point and use a rather minimal layout like I've done here. I dressed it up with a little "bling" and a twine/button treatment, that's all it really needed. 

Monday, March 9, 2015

Lucky horse shoes

It's just down right tough being me some days, lol!! My time management lately has been seriously lacking and in need of an overhaul but honestly, I'm just to darn lazy and tired to even think about it!! This post should have been written up last night (or even before) so that it could post first thing this morning. Yesterday I was soooo tired and felt lethargic and could hardly move after I got off work. Got to work this morning and had lots to do so couldn't get to my post right away like I'd hoped...sigh. What's a gal to do, right??


Are you ready for St. Patty's Day?? I thought I'd show this quick and easy card that I came up with. 


I started off by pulling out some white cardstock and made my own patterned paper using images from the Lucky Irish and the Southwest petit four stamp sets. I "google images" a horse shoe to use as a template and cut it out. I adhered all my layers together and after tying some twine onto my horse shoe added it then blinged it out a bit. I made the little sentiment panel and popped it up using foam tape. I thought it needed an anchor to I punched 3 hearts and cut a little sliver of paper to make the clover. Easy peasy, right?? 

Happy St. Partick's Day
Lucky Irish Stamp Set
Southwest Stamp Set

Monday, March 2, 2015

The Shabby Tea Room - challenge #247

The Shabby Tea Room

Hello shabby friends and welcome to another fun week of inspiration and creativity here in the Tea Room!  This week our challenge is called Pop of Pink!  Please create a card/project INSPIRED BY THE PHOTO!

FOR YOUR SUBMISSION TO BE ELIGIBLE FOR THE WEEKLY PRIZE AND HONORS: Because we are sponsored weekly by wonderful businesses who have graciously donated products and in the interest of fairness to all participants, any entries that do not follow our simple challenge rules will remain in the gallery but will not be eligible for the weekly prizes and top honors. Thanks for your understanding and participation!

Hi everyone, isn't that inspiration picture just too sweet? I wanted to keep with the "country feel" so I pulled out one of my favorite Paper Smooches sets called "Crystal Clear". It also has several matching die sets to cut out a lot of the images.

 I stamped and die cut a little mason jar then "dry fit" it to a white panel and stamped my flowers (from DeNami - Elegant Spring Flowers) then colored them in. I removed the jar and stamped my sentiment (also by DeNami - sending you love). I then took my panel and ran it through a swiss dot dry embossing folder and adhered it to my card base with foam tape. I wanted the jar to have dimension too so I attached it with foam tape also after adding a piece of twine around the "rim" of the jar. I thought it needed just a touch of something else so I tilted the lid up against the jar and added a sprinkle of sequins in the upper corner to balance to the whole card. 


 The Shabby Girls are pleased to welcome our sponsor -  Dies R Us!

Please link your creations to The Shabby Tea Room by Sunday, March 15th to play along. Winner and Tea Time Terrific Top Three will be announced Monday, March 16th. We will have an all-new challenge for you to play along with on the 16th as well, so please come back and visit with us again for another chance to win!

Friday, February 27, 2015

Happy Birthday Chick...

Hi everyone! :)  You know the biggest fun of my 2nd job....opening boxes and seeing all the new goodies we've ordered for the shop! You know the biggest downfall of my 2nd job....opening boxes and seeing all the new goodies we've ordered for the shop! At least I'm still making $5 dollars of my paycheck for the weekend ;)  hehehehehehe!!

When I saw this little cutie from Woodware Stamps (company out of the UK) I just knew I had to have it and then I read the sentiment, well that just sealed the deal right then and there!!

Isn't she adorable and how can you not just giggle at the the "no spring chicken but still a tasty dish"? As soon as I saw it I knew I had to make this for my bestie...it's sooooo her!! A cute little critter and a funny pun, right up her alley! 
I wasn't sure about how to do the layout and keep her center of attention, I opted for something easy and had the issue of what papers...I went with some "french country" prints by Graphic 45, I thought the colors were so pretty together. You can easily see how I put the card together. I cut a tall fold base out of charcoal cardstock (4 1/4 X 11) then cut the base panel ( 4 1/8 X 5 3/8) and added it to the card base. I added a strip of the flowered paper to the bottom and then decided to add more layers VS. the cream colored crocheted lace I was going to add.  I used the "nest" stamp to make a little border by stamping it and then distressing it and then added a little charcoal strip that I had edge punched. I distressed a white doily and added it to the upper center of the card and placed my focal image there. I added the legs by poppong them up on foam take for some fun dimension and to make her look like she was sitting up. Notice something missing?? After adhering the chicken I realized that I had forgotten to put her on a panel of charcoal that I had cut...GEEZE!! There was no way to get the chicken back up without tearing up the doily and there was no way to get the doily up either without tearing up the panel under it...sigh, it had to stay just like this....dang it! Ahh well, it still turned out cute even though it missing that charcoal panel. ;P  Just imagine it being there, hehehehe!!

That's all for me today. I'll see ya back here on Monday with a new challenge from The Shabby Tea Room! I have a pretty little CAS card to share ;)


Monday, February 23, 2015

Forever Friends Birthday

Ohh my goodness, I still haven't gotten my card for The Shabby Tea Room finished...uggg! I just feel so darn tired and have not a speck of energy, sorry!! Until then I have something I made right after the lastest DeNami release to show you. I thought I may have already shown this to you but I didn't find it in the archives so i guess I hadn't, oops!

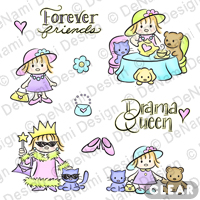
Isn't she cute? This set is perfect for any little girl and makes adorable cards. I'm giving this to my adorable just about to turn 3 niece. :) I wish the images were just a tad bigger to allow for copic coloring. It's super easy to color but you just can't really do all the copic shading.

 forever friends


I just love the images in this set! AND bonus...it's a clear set to boot!

Well that's it for me today! I'll see y'all soon :)

Friday, February 20, 2015

Tips & Tricks - die storage

Sooooo, I was supposed to have a card to share with you today. On Wednesday evening I printed my digi image from Bugaboo Stamps, colored it 3 different times (because I wasn't happy with the first two attempts) then left it sit on the coffee table where I had colored it because I was being lazy and thinking I'd get to it on Thursday evening and make the actual card. Well, Thursday morning when I woke up there was a slight problem!! One of my kittys, who rarely ever do anything wrong, had done something very wrong! They never get on the table but my Valentine flowers proved too much of a draw so on the table he went...we all know where this is leading...what a mess!! I had colored a cute watering can filled with flowers but seriously, they didn't need actual watering...good grief!!

Well, all this means I don't have a card to post. I'll have to recolor my image then make a card for it. At least I have the colors I wan't to use now (thanks to already coloring it 3 times, lol) and a layout kind of figured out. Darn cats, sigh!! I haven't posted in a while since I was a bit under the weather and didn't want to NOT post something today so I thought I'd do a little segment that I haven't done in ages and share a little storage tip with you.


Have you ever bought a die that has multiple pieces? They all come in those thin "re-closable" bags that stop re-closing after the 3rd time because the sticky isn't sticky any longer and the sides rip out...yeah, what a pain!! Well, For quite some time now I've had a partial solution and now I finally have the whole issue figured out thanks to one of my students in the mini Christmas album class I taught at my local stamping shop! 

I've used the Avery Elle envelopes for my stamps and dies for a long time now and LOVE them. Heavy duty, plenty of room...perfect. However, when you have dies that have multiple pieces and/or stack you still end up with a mess like this...

Someone asked about a certain die I was using for the book and I pulled out my Avery Elle envelope with my Taylored Expressions Postage Stamp Stacklet die set (that was all loose and jumbled in the bottom of the envelope) to show her. The gal next to her said she had a perfect trick to keep my dies organized. Sometimes you get lucky and a die will come on a little magnetic sheet (woo-hoo, right?) but I never thought to go to my local big box home improvement store and BUY magnetic sheets that can be cut to any size I want! Vent covers!!! DUH!! For $4 & change I got this 3 pack of 8" X 15" sheets. They can be found hanging right next to the floor vent replacements. These magnetic sheets are a little sturdier than the ones that some dies come with so I'm going to eventually replace those as well. 
I measured out the size I wanted and cut it with a regular pair of scissors. The underside is white so I easily measured and made pencil marks so that my cutting lines were straight.
Now all of my dies are not only in nice little envelopes but aren't banging around and all jumbled up either!


Well that's it for me today. I hope you enjoyed this little trick that I came across! I'll see ya on Monday with a card...promise ;)

Wednesday, February 18, 2015

The Shabby tea Room - challenge #246

Hi everyone, sorry that I've been MIA, just feeling a bit under the weather lately but I'm feeling much better (woo-hoo for meds!) now. This past Monday we started a brand new challenge over at The Shabby Tea Room so I thought I'd share it with you even though I haven't made my card yet...but it's coming ;)

Week #246 - February 16, 2015

Hello shabby friends and welcome to another fun week of inspiration and creativity here in the Tea Room!  This week our challenge is called Mason Jar Love!  Please create a card/project INSPIRED BY THE PHOTO!

FOR YOUR SUBMISSION TO BE ELIGIBLE FOR THE WEEKLY PRIZE AND HONORS: Because we are sponsored weekly by wonderful businesses who have graciously donated products and in the interest of fairness to all participants, any entries that do not follow our simple challenge rules will remain in the gallery but will not be eligible for the weekly prizes and top honors. Thanks for your understanding and participation!
And now for some more beautiful inspiration from the Shabby Girls (please click on each designer's blog link to view additional photos of their projects) ...

 Debbie MarcinkiewiczPaper Sweeties
{Creator}


Diane Hover - Nellie's Nest
Bugaboo Stamps:  Flower Pot 4


Lenet Mos - To Scrap or not to Scrap, that is the Question
Bugaboo Stamps: Chicken Duo


Rebecca Deeprose - Paper Primrose
Bugaboo Stamps:   Balloon Bundle


Tina Milbourn - Confessions of a DeNami Addict
Bugaboo Stamps:


 Tracey Kelly - Trace Elementz
Bugaboo Stamps : Butterfly bubbles tag

Now, hop on over to our Shabby Girl individual blogs to see lots more creative and beautiful inspiration, additional pictures and instructions for these projects!
 The Shabby Girls are pleased to welcome our sponsor - Bugaboo Stamps!

As if raising five children in the frozen land of the North was not enough of a challenge, Jodie Mackrell decided to dip her cold little Canadian toes into the world of paper crafting by opening an online store full of her illustrations. That was two years ago. Today Bugaboo Stamps is one of the leading companies in digital images, and we're still growing!  From seriously snarky to sugary sweet to sublimely soulful all the way over to the other side of the super sexy spectrum, you're bound to find all that you need and more to create your paper projects.  Jodie works very hard to provide New Releases and Freebies every week!

If your taste runs to rubber (and you know who you are), you can find Bugaboo Stamps stamps at Totally Stampalicious. And finally, join the Bugaboo Stamps DT  for weekly challenges at Catch the Bug.

Our links are:
Store : http://www.bugaboostamps.com/
Catch the bug Challenge blog:  http://catchthebugblog.blogspot.com/

 
Please link your creations at The Shabby Tea Room by Sunday, March 1st to play along. Winner and Tea Time Terrific Top Three will be announced Monday, March 2nd. We will have an all-new challenge for you to play along with on the 2nd as well, so please come back and visit with us again for another chance to win!

Monday, February 9, 2015

I like you "a latte"

Hi everyone, did you have a good weekend?Mine was busy as usual, I worked all weekend at The Stamp Pad and taught a class - we made 10 pages in a 6X6 scrapbook. Can you believe we are well into February already...my gosh!


Today I want to share a card that is part of my next class. I named it "Oops, I almost forgot". It will have a friend, birthday, belated birthday & wedding/anniversary card. here's the "friend" card.
The stamps are by Impression Obsession. I stamped the cup on my panel then stamped it again on computer paper to make a mask. After placing the mask on the cup I stamped the coffee ring then stamped the steam twine (in 2 colors). I set that aside and made a kraft card base by cutting the 8 1/2 X 11 piece ling ways. I added a piece of Doodlebug double dot Caribbean then added a piece of ribbon around the card and tied it into a knot. I cut a mat for my focal panel and attached them together then popped it up on the card using foam tape. I added a little twine to the knot and after I took this picture I decided to add 4 teal nail heads coming down the right hand side at the top. Super easy layout for a larger stamp or smaller put together ones like I've done here.

Thursday, February 5, 2015

Valentine Treats

Hi everyone! Are y'all ready for Valentines Day? I made a couple of treat boxes for hubby, now my only issue is to try not to eat the yummy chocolaty goodness before I give them to him, lol!

I started off with 2 different boxes from the Boutique Box section at DeNami - CB200 2-1/4 X 2-1/4 X 1 and CB500 4-1/2 X 1-1/2 X 1.

For this box I simply added a strip of Washi around the top and bottom edges. I die cut a little panel that leaves a small embossed edge. I colored the edge to make it look like it was layered then randomly stamped the little hearts in a pale pink. Using the sentiments from the Monster Love set I stamped two in a hot pink and the kisses in red and then colored it in so it would stand out more. I added a bit of twine and two little punched hearts to finish it all off then attached it to the upper corner of the box with my tape runner. 

This box was made pretty much like the other one. I started with a strip of washi around the center of the box. I Die cut a panel and colored the edge then stamped the little hearts randomly in a pale pink. I decided to go with an image this time around instead of just a sentiment. After stamping and coloring the owl special delivery I simply attached it to the box using my tape runner....easy peasy, right?

Monday, February 2, 2015

The Shabby Tea Room challenge #245

Ohh my goodness, what a few days I've had!! I was just too worn out to write up today's blog post last night and thought I'd do it first thing this morning...then life happened again!! Jeeze! Sorry I'm so late!


Today we have a brand new challenge over at The Shabby Tea Room AND a brand new sponsor! I'd like to give a warm welcome to My Artistic Adventures Etsy!! She has a full line of papers and focal images for ANY occasion!! Let's get started shall we?


Hello shabby friends and welcome to another fun week of inspiration and creativity here in the Tea Room!  This week our challenge is called 'I {heart} You'!  Please create a card/project INSPIRED BY THE PHOTO!

FOR YOUR SUBMISSION TO BE ELIGIBLE FOR THE WEEKLY PRIZE AND HONORS: Because we are sponsored weekly by wonderful businesses who have graciously donated products and in the interest of fairness to all participants, any entries that do not follow our simple challenge rules will remain in the gallery but will not be eligible for the weekly prizes and top honors. Thanks for your understanding and participation!

Ready to see what I made? I couldn't resist this darling bingo card I found on My Artistic Adventures site, it was too darling!!
Items Used:


My Artistic Adventures Etsy has been meeting the designing needs of artists who like to use unique, vintage-inspired digital images in their creations.  The images have been used to create cards, layouts, tags, altered art, Christmas ornaments and other art pieces since May 2012.  My Artistic Adventures' selection of Digital Collage Sheets will help you with your Christmas, New Years, Valentine’s Day, Easter, Floral and other creations that you would like to create with a Vintage Shabby Chic feel.  Easy online shopping, affordable prices and fast delivery of purchases by instant download are available through the shop.

10% discount for the Tea Room followers this week: SHABBYTEAROOM10 
Challenges the 2nd & 16th of each month on the My Artistic Adventures Challenge Blog


This week's lucky winner will receive $18 of Digital Collage Sheets
This week's Tea Time Top Threes will each receive $6.00 of Digital Collage Sheets
 
Please link your creations at The Shabby Tea Room by Sunday, February 15th to play along. Winner and Tea Time Terrific Top Three will be announced Monday, February 16th. We will have an all-new challenge for you to play along with on the 16th as well, so please come back and visit with us again for another chance to win!

Monday, January 26, 2015

My Mind TRULY DOES wander!!

Hi everyone and happy Monday to you! I hope you had a good and restful weekend :)

 I was cleaning up the back area at The Stamp Pad where I work weekends and teach and came across this random sentiment stamp by Deep Red and immediately fell in love with it and wanted to make a card and since we need some new store samples it was a win-win so I checked to make sure it was still available and got right down to playing! ;)  The card turned out so cute that I've held it back to be one of the cards for my February class...oops, lol! 


I thought this sentiment describes me perfectly on a daily basis, lol! It also called for a belated birthday sentiment on the inside - story of my life, I'm such a bad card maker these days ;)


What I really like about the sentiment too is that it is color-able so you can really make it match your card by coloring it a complementary color like I've done for this card or make something funky by coloring all the letters in different colors for a fun and bright card.

Thursday, January 22, 2015

Thinking Of You

Hi everyone!! Have you ever found yourself in need of a card and have about 5 minutes to get one done? Well, recently I was in that position and managed to throw something together. It's not the prettiest card in the world it's still a nice card and worked out just as I had hoped. 

While I have a ton of dry embossing folders, I never use them as a main focal point. I normally use them to add a touch of dimension as a panel mostly hidden under my focal point. However, for this card I used a new folder that I recently purchased that's meant to be the focal point....

DeNami recently put all of their folders on sale for $3/each AND I was lacking a couple of dollars to qualify for free shipping so I added the Scrolls embossing folder to my order. Like I mentioned before, I would normally not use this type of folder but at the time of purchase I was thinking that I just needed to try something new and here was a great opportunity.

I started with a navy A2 sized card base. I cut a light blue panel and ran it through my Vagabond with the embossing folder. Then I took a scrap of white cardstock and ran that through the embossing folder too. All I wanted was the center so using a scrap was just perfect. I cut out the center panel and stamped the sentiment from the new Heartfelt Blessings clear stamp set in the center. It looked like it needed a little something so I stamped one of the little "extras" from the set at the bottom of the panel. I attached the light blue panel to the card base then using foam tape attached the white sentiment panel. To finish it all off I added a navy grosgrain ribbon/bow and some cupped flower sequins from Paper Sweeties with a little Stickles in the center.

Like I said...super easy card that took about 5 minutes and I was able to rush out the door on time! I'm thinking I could get to like using dry embossing folders as a main focal point! ;) 

Monday, January 19, 2015

The Shabby Tea Room - Challenge #244

Week #244 - January 19, 2015


Hello shabby friends and welcome to another fun week of inspiration and creativity here in the Tea Room!  This week our challenge is called 'Forecast?  Freez'in'!  Please create a card/project INSPIRED BY THE PHOTO!

FOR YOUR SUBMISSION TO BE ELIGIBLE FOR THE WEEKLY PRIZE AND HONORS: Because we are sponsored weekly by wonderful businesses who have graciously donated products and in the interest of fairness to all participants, any entries that do not follow our simple challenge rules will remain in the gallery but will not be eligible for the weekly prizes and top honors. Thanks for your understanding and participation!

Well, as soon as I saw the picture I pulled out burlap and lots of browns and even a piece of plaid paper and was going for a total rustic look, well, as you can see, none of that worked out for me, lol!! 

I started off with a chocolate A2 sized card base and set it aside.  I cut a piece of rustic looking snowflake paper and knew I wanted to pick up the blue from that paper so I made a little blue banner and attached it in the center of the patterned paper. I debated weather or not to run the banner through my snowflake embossing folder and decided against it due to laziness, lol! I then attached a large doily in the center at the top and tied on some yummy seam binding. I added some twine and (my LAST set - yikes) rusty jingle bells. I die cut the snow drift from glitter paper and attached it by adding glue to just the ends and slipping it under the seam binding. I stamped and die cut the snowman and snowflakes (did the snowflakes twice). After coloring the snowman I slipped him under the snowdrift just a little (that's why I only added glue to the 2 ends). I glued the first set of snow flakes down flat then added foam tape to the 2nd set and placed them on top of the flat ones turning them slightly so they were staggered. 

 The Shabby Girls are pleased to welcome this week's sponsor:  Paper Sweeties!


Paper Sweeties offers high-quality, on trend acrylic stamps, coordinating metal dies and pretty embellishments. Our heartwarming images allow paper crafters to create handmade from the heart treasures that will be keepsakes for years to come!  We carry adorable dolls with interchangeable outfits and accessories ... plus we also have a wide variety of wonderful all-occasion sentiments, labels, frames and accessory sets - perfect for every paper crafted project! You'll enjoy using your Paper Sweeties stamps, dies and embellishments to create projects for card making, scrap booking, party invitations and favors, home decor, gifts and so much more!

Winner will receive a $10 gift certificate from the Paper Sweeties boutique!

 
Please link your creations at The Shabby Tea Room by Sunday, February 1st to play along. Winner and Tea Time Terrific Top Three will be announced Monday, February 2nd. We will have an all-new challenge for you to play along with on the 2nd as well, so please come back and visit with us again for another chance to win!

Thursday, January 15, 2015

Are You Ready For Wedding Season

Hi everyone! Are you thinking about wedding season already? I'm sure not even close to being ready to think about it but after last weekend I think I may be behind! As you know I work a lot of weekends at The Stamp Pad, a local small family owned stamping store. Well, last weekend I had 2 separate gals come in looking for wedding themed things!! They both said they were gearing up for wedding season...who'da thought, it's only January after-all? I feel like such a slacker since I don't even have Valentines under control, lol!

Who am I to stand in the way of you over achievers, lol, how about a pretty wedding card today?


I simply LOVE black and cream together, probably one of my fave color combos for sure. I started out with a black A2 sized card base. I cut a cream panel and dry embossed it then ran a strip of cupcake seam binding across the middle before adhering it to the card base. I die cut 2 panels and stamped my image and adhered them together then adhered that to the center of the card. I stamped the frame and sentiment on a piece of scrap cream cardstock and fussy cut it out. I looked through my stash and came up with the key and roses. I added more seam binding bows and the little roses to finish it all off.


Monday, January 12, 2015

YAY!! - introducing DeNami clear stamps

Ohh my goodness, I had this post all planned then got so wrapped up in life that I didn't write it!! I'm sooo sorry!! Well, better late than never so they say...but really, who is "they" anyway and what the heck do they know, lol!! Let's get to the post and forget that I'm late, mmk?? ;)

Did you see that when DeNami came out with their latest release of images that they are now offering CLEAR stamps?!?!? I'm was giddy over the fun news and couldn't wait to get my hands on them and play. I wanted to feel the overall quality, depth of the image, see-thoroughness, how well they "stuck" and how well they cleaned up. I'm giving them a thumbs up across the board! I love the set that I played with and as soon as I get a little free time I'm breaking open the other!

If you follow the DeNami Addict Facebook page you may have seen this little peek....I had a hard time deciding which set to use first so after a little "iney meany miney moe" session I chose the Monster Celebration set.

I pulled out some fun colored cardstock and some yummy patterned paper I knew I had stashed away in my scrap pile from last spring.

Ready to see the finished card? Let's see these cutie monsters all colored up!


I started off with some hot pink cardstock for my A2 sized card base. I cut a piece of patterned paper and attached it to the card base then set it aside. I cut a white panel, stamped on the image from the Monster Celebration set and then trimmed it to to what I thought was a good size. I then cut another piece of the hot pink to mat the white panel making sure to keep it a bit longer and punched the edge to make scallops. I took a scrap of the left over patterned paper and turning it over to the contrasting side, made a little banner/flag by notching one end with a pair of scissors. I set all of the pieces aside and colored my image and then to fill in around it I randomly stamped one of the sentiments in the set along with the mini polka dot stamp (a long time fave of mine). I layered the white panel onto the hot pink then added a bit of twine with a little button/bow before adhering it to the card base. After deciding where I wanted the little flag I put a little adhesive across it's top (front & back) and gently lifted up the edge of the scalloped panel and slipped it under. 


You can't have a fun little card like this and not add glitter, right? I pulled out my quickie glue pen and Extra Fine DeNami glitter and added some blingy love to my little monsters ;)


Monday, January 5, 2015

The Shabby Tea Room - Challenge #243

Week #243 - January 5, 2015


Hello shabby friends and welcome to another fun week of inspiration and creativity here in the Tea Room!  This week our challenge is called 'Baby It's Cold Outside'!  Please create a card/project INSPIRED BY THE PHOTO!

FOR YOUR SUBMISSION TO BE ELIGIBLE FOR THE WEEKLY PRIZE AND HONORS: Because we are sponsored weekly by wonderful businesses who have graciously donated products and in the interest of fairness to all participants, any entries that do not follow our simple challenge rules will remain in the gallery but will not be eligible for the weekly prizes and top honors. Thanks for your understanding and participation!

Ready to see what little thing I came up with?? 


 The Shabby Girls are pleased to welcome this week's sponsorThe Cutting Cafe

The Cutting Cafe is your one stop for affordable cutting files and printable stamps. We offer a huge selections on just about any occasion.

This week's lucky winner will receive three cutting files from The Cutting Cafe!

 
Please link your creations at The Shabby Tea Room by Sunday, January 18th to play along. Winner and Tea Time Terrific Top Three will be announced Monday, January 19th. We will have an all-new challenge for you to play along with on the 19th as well, so please come back and visit with us again for another chance to win!