Friday, March 29, 2013

A little DeNami haul video (Feb 2013)

Hello everyone! I hope you all enjoyed the Easter cards I've been showcasing and the Easy start to finish Easter card video I made. I really enjoyed showcasing DeNami's wonderful Easter images!!! Going to miss them, but now that spring is here I can shift my focus on pretty spring flowers and Mother's Day creations...I just can't wait!

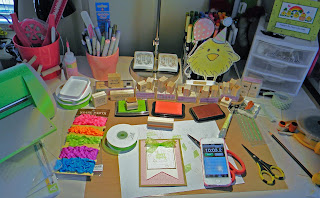
Today I wanted to share a little haul video I made a little while back but hadn't had a chance to post. There's lots to see so I'll let you get started :)  Hope you enjoy!!


Product list:
EK-65 Bracket Punch
GL01 Quickie Glue Pen
Twine
Brilliance Inks
Washi Tape
Sparklets Glitter
Rhinestones
Cardstocks
J59 film strip
J60 curled film strip
J65 camera
E85 small orchid
I45 large orchid
P45 birthday scene
P62 christmas gifts scene (on clearance for $9.94)
I42 small block frame
I43 small solid frame
D95 solid scallop circle
J130 easter chickie circle
N121 Hoppy easter scene
PF15 Easter stamp set petit four

Our friend Amy's blog is Standing Ovation. She is uber sweet and adorable. Stop by for a visit and check out that AMAZING film strip Washi card she made :)

The 2 1/2" (pink) Marvy scallop circle punch not only works perfectly with the Easter Chickies Circle stamp but works with all of the "round" stamps that the product number starts with the letter "J"

Well, that's it for me today, thanks for stopping by!!


Wednesday, March 27, 2013

one layer chickies

Hi everyone, I have one last Easter card to share with you. I couldn't resist pulling out one of my fave one layer card designs and making a fun Easter card. It's perfect for mailing since there's no bulk and easy enough to replicate when you're sending out a ton of cards for the holiday.


I generally use the polka dot background stamp for this layout but I just can't seem to put this wonderful gingham stamp down!! That's it for me today, I'm off to my crafty area to get a head start on Mother's day cards for all of you :)

Thanks for stopping by!!

Tuesday, March 26, 2013

Penny for your thoughts....

Hi everyone! Have you tried the 10 Minute Craft Dash over on the Pretty Pink Posh blog yet? It's really taken off and no wonder, it's so much fun!! I really look forward to participating and this time around I have a 2nd entry.


Now I know you're looking at this card and scratching your head, and frankly, I'm still doing a little head scratching myself. I can't remember ever making a card so graphic. I'm a layer and fluff kinda girl and this card certainly isn't. Well, there is that yummy bow...it's got my name all over it ;)

I don't sleep we'll and sometimes I pass the time by laying in bed thinking of card designs. I was thinking about one of the latest trends out there, arrows. I actually made a mental note to see if there was a punch or just precut pieces when a brilliant idea popped into my head. I just knew it would work and was way excited. I laid there a little longer and even came up with this layout. Still not sure where it came from because this is not my usual...
As always, I jotted down my idea for the overall card and pulled out my supplies

I can't believe this card came together so fast! 8minutes 7 seconds on the clock. Fortunately my bow didn't need fussing with, it came out perfect the first time around so i saved LOADS of time.
I didn't use many stamps creating this card. My signature polka dots of course and a fun chevron both by DeNami and an alphabet by Lawn Fawn. It's funny that they happen to be the sponsor for this challenge. I just love their alphabets because if how they line up. I never have an issue with making sure they're evenly placed like I do other brands.

I'll let you in on my secret to making my fun arrows. I simply punched a scallop square then snipped a corner off and then cut out the "V" shape leaving me with a fun arrow. Easy to do and a fun new look!

If you haven't entered the 10 Minute Craft Dash yet you should check it out....LOADS of fun :)

Monday, March 25, 2013

Tips & Tricks - March 2013


Today I'd like to talk about sentiments and just how versatile they can be. In the past i never really bought many sentiments and honestly just never really used them. I still have a bad habit of not using sentiments, although, I'm working on fixing that. Sentiments can make great focal points....

For this first card I simply used the Thinking of You circle sentiment and the dot circle frame in a fun new way. Instead of using them on a punched circle for a tag I randomly stamped them in a wave motion across the card panel. To finish it off, I added a little bling and a yummy matching ribbon. This card took just a few minutes to create, used only 2 stamps and is eye catching. 


This card was just as equally easy to create and only used one little stamp. I started off stamping the Happy Birthday (cling) sentiment in a light pink, filling up the entire panel. I switched to a darker pink and randomly stamped the same sentiment for pops of color. Added a little ribbon and button to finish it all off. Once again, created a cute little card using just a sentiment and it was quick & easy.


This next example literally took 10 minutes to do. I wanted to make a card for the 10 Minute craft dash over on the Pretty Pink Posh blog and after a little thinking decided to incorporate one of the fun fads that's out there right now. This fad just so happens to fit right in with today's theme too! Subway art. We've all seen it and like it, but most of us have resisted because it looks hard (me included). I was surprised at how easy it really was. I pulled out some sentiments and played around with them until I got a general idea of what I wanted.

I had a good idea of the overall design and all of my supplies at hand. I hadn't decided what ribbon to use so I had a selection and also brought out some yummy green rhinestones for "just in case".


I knew the time was getting close so I ended up grabbing the easiest to get to ribbon and didn't even bother to try with a little bling (wasn't sure about bling anyway, so no matter). When all was said and done, the timer showed 10 minutes 3 seconds. However, in my defense, I'm calling it an even 10 minutes because I had to grab my phone, push the button then slide the screen thingie then push the stop button and all that took about 3 seconds. ;)


WHEW! All that aside, see how fun just using sentiments as your main focal point can be?

Weather going for something fun and flirty or something a little more classy, sentiments can play a major role in your card making. I hope I've made you look at sentiments in a whole new way! Thanks for stopping by :)

Friday, March 22, 2013

Easter chickie...

I just could not resist pulling out my gingham background once again...I seriously can not get enough of this stamp right now!! Have you ever had a stamp in your stash like that? It's so fun and versatile. I've used it here, here, & here. I have a ton of ideas to make with it too, how exciting!


This little card was super easy to make. I simply stamped the gingham half way up the card and added the little punched strip. Then I punched the scallop circles and stamped them using the coordinating frame stamps. (Did you realize that DeNami carries little frame stamps that perfectly fit most circle  punches? They even have a printable easy reference sheet. ) I stamped my circle frames then filled them in using the eggs and Easter chickie. After coloring them in I simply added a little foam tape and adhered them in a fun pattern. This would be a great layout using flowers, critters with a matching petit four images or images from any holiday.


Now for some more fun...announcing the winner of the gingham background stamp!! Thank you to everyone that entered :)   I used Random.org to pick the winner and that lucky lady is.....
Heidi Hurley
Heidi, please drop me an email with your mailing address and I'll get your stamp ordered and out to you right away!!! Congratulations!!  
Well that's it for me today, thanks for stopping by!

Wednesday, March 20, 2013

He Is Risen....

I wanted to use the brand new "He is risen" sentiment and thought it would pair perfectly with the beautiful cross image I picked up recently when I was marking some things off my DeNami wish list. 


 I didn't want to distract from my focal image so I kept my background (garden accessories & ornamental flower sets) to a minimum and added some yummy glitter to the edges of the leaves to give them a little highlight. 

Thanks for stopping by!


Monday, March 18, 2013

Tool Talk - March 3013


 Hi everyone and welcome to another addition of Tool Talk. Today I have another amazing and talented artist that has graciously agreed to speak with us about her favorite tool. She really needs no introduction; she's a crafting wonder woman...Design team member at DeNami Design, CAS-Fridays and CAS-ual Fridays Stamps :)Whew, where does she get the time?!?!?


Hello hello DeNami fans! It's Dana here from Kismet Art and Life.

This “Tool Talk” feature is a great way to be introduced to a product that you might not know about. I cannot wait to share my love for a favorite tool with you today, so let's get right to it:)

Wanna know a secret? Until 7 years ago, I exclusively cut all my cardstock and paper with an exacto craft knife and a metal ruler. Seriously. I am the least OCD person you will ever meet except for when it comes to grammar and straight edges.  * Chuckle * And then, oh dear, watch out! If things aren't perfect I fix them until they are.

No paper trimmer ever met my standards for a perfect 90 degree angle or smooth edge until I discovered Tonic Studios Guillotine Trimmers. * Swoon * Just so you know, I have 4 FOUR other paper cutters from top brands ranging from not cheap to more than I want to admit paying and none of them met my requirements. None.

I now own 3 Tonic Studios trimmers and I could NOT craft without them! A large 12 x 12 model that I use for cutting all my card bases with, a medium (and most often used) size of 8 ½ x ~5, and a smaller one that is 6 x 4.
6 X 4

8.5 X 5

12 X 12


These babies NEVER need sharpening or blade replacements. My two larger sized ones have been in use for 7 years now and still cut like butter as if they were fresh out of the package. No jagged or rough edges, a clean, perfectly aligned cut every time. Every. Time.
That is really important to me:)

Pros:
  •  Easily portable (minus the 12 x 12 even though I do take it to crops) and lightweight. 
  •  Blade never needs sharpening
  • Perfect crisp, clean, straight edges on your cuts.
  • Measuring grid/ruler right on the trimmer for ease of repeat cuts.
  • SAFE. Because the blade isn't a “knife” blade, little fingers won't be sliced open        if the kiddos get a hold of it. 
  •   Cuts through several sheets of cardstock at a time with no additional effort.

Tips for using guillotine trimmers: 
  • Be sure to press down firmly on the two transparent (orange on newer models  I        think?) paper holder tabs on the base. It's become second nature for me, but I  recall   forgetting a few times when I first purchased them and my cardstock would slide and I wouldn't get a perfect cut.  
  •  Bring the cutting arm all the way up to it's highest position before slicing downwards. 
  • Make sure your table surface is solid and stable. i.e. Don't cut on a stack of wobbly magazines piled on your work area...ask me how I know this :(

I found a great price for the 8 ½ inch trimmer just for you DeNami Addict readers, and they are offering FREE SHIPPING right now! Only $14.04!!


Thanks for sticking around while I talked up my favorite crafting tools! Let me know what your experiences are with Tonic Studios Guillotine Trimmers.

Thanks for joining us today, Dana! I have to confess that after reading her post I've already ordered my new trimmer! It's a bargin and I'm not so in love with mine (can't stand edge fuzzies).
 
Don't forget to join in on the fun on the DeNami Addict Facebook page. I'm giving away a wonderful DeNami gingham background stamp and all you have to do is "like" the Addict FB page and leave a comment on the special post (ends 3/26/13). Thanks for stopping by!!

Saturday, March 16, 2013

Elegant embossed birthday card + 10 Minute Craft Dash

Hi everyone, I know it's Saturday, but I wanted to pop in with my entry for the 10 Minute Craft Dash over on the Pretty Pink Posh blog. I'm running down to the wire with this one in more than one way!! The challenge ends today and I took the full 10 minutes to create my card! I'll keep this post super short....


Before: I pulled out all of my supplies and dry embossed some chocolate, cream & sage cardstocks

After: What a mess, but I did it!!! (ticks me off that I wasted time punching circles that I didn't need...should have planned better!!)

My creation with literally only a couple of seconds to spare:

It only took a couple of minutes to put the card together but punching those circles cost me a ton of time, I should have punched them before starting.  I saw a card similar to this on Pinterest and just had to make one with my own little spin. I have to admit to 2 little bloopers. 1st one is that I had to leave off an element. Since I used sheer ribbon, I planned on using a strip of cream cardstock under it to cover the top of the punched circles and 2nd, after the time stopped I did a little "clean up" on some tape runner that was peeking out under a few of the circles. I still love the outcome and think I'll visit this layout again sometime.

Don't forget to join in on the fun on the DeNami Addict Facebook page. I'm giving away a wonderful DeNami gingham background stamp and all you have to do is "like" the Addict FB page and leave a comment on the special post (ends 3/26/13). Thanks for stopping by!!

Friday, March 15, 2013

A visit with Chickie...

Hi everyone, it's Chickie Nakamura bringing you a special blog post. Bet you're surprised to see me here on the Addict blog today! Today is a special day because Tina has agreed to let me do a whole post of my own. I was so excited when she agreed to it...was a little nervous that she wouldn't, but my idea of posting about my fun time with her and her family was such a good idea that she couldn't say no. :)

I had a great time on my visit and was lucky enough to even be invited to her niece & nephews 1st birthday party.

Tina said she's sorry about the pictures, she didn't realize her batteries were so drained on the camera
To start off our fun weekend, her Mom came over and we went to the nail salon for a little manicure, then had some seriously fun times shopping. I wanted to go to the mall, but apparently Tina has an unnatural obsession with Target because she insisted we go there instead. I thought I should get to pick since I was the guest but she wasn't having it. That's okay though, I like Target too and she said that it had a Starbucks inside it so that really made me happy.

The first place we hit was the shoe section...
They had LOTS of new styles to choose from...3 pairs later and Tina was happy happy happy! Then we browsed the other areas of the store and finally ended up in the toy section.
The toy section was real fun. I can't believe how many isles of toys there are...wow! Tina finally decided on this fun wagon. I'm thinking I need to ask my Mom, Nami, to get me a wagon too. I can put all sorts of fun things in it, other Chickies, teddy bears, baby dolls, flowers and even Christmas trees...fun fun fun! :) Fingers are crossed, wish me luck asking her!!!

After we came home I helped Tina make the twins a birthday card. Don't you just love the fun colors and those wood veneers she picked up from Ellen Hutson? She found that site through my sister, Paulina. There's a link on Paulina's blog, Pretty Pink Posh.
Tina used her ink pads to color the wood veneers so they would perfectly match the card then coated them with Crystal Lacquer so the color didn't rub off...she's pretty smart! ;)

 I had a ton of fun at the party too. There was chili, hot dogs, chips, veggie trays and of course, cake & ice cream. There were fun decorations, lots of presents and Lucy & Henry even had their own cakes that their Mommy had made for them (she's uber talented). Tina told me the story about how they were born too early and had a little trouble getting their start in the world so this occasion was truly a blessing to celebrate. Here's some pictures of me enjoying the fun festivities...


Before I left to go back home Tina and I discussed her DeNami collection. She was telling me that her favorite stamp right now is the new gingham background. I suggested that she put one up in a giveaway. We did a little brain storming and decided to make it a Facebook giveaway. All you have to do is "like" the DeNami Addict Facebook page and leave a comment on the giveaway post she will have the page a little later today. If you already like the Addict page just leave a comment on the special post. Tina will randomly draw a name on Wednesday to win a brand new gingham background stamp...how fun!! (And isn't the graphic with my picture cool? Tina asked my sister, Paulina, if she could make something fun for the giveaway and she took time out of her busy busy busy schedule to help out, she's super awesome!)


Thanks for stopping by and reading about my fun time, I hope to visit with you too very soon. Don't forget that there's fun stuff planned all month long over at DeNami so check the party page often for new updates!

See ya later,
 Chickie

Wednesday, March 13, 2013

The Project Corner - Easter Card video


Hi everyone! Today I have another easy start to finish card for you. I really enjoy making the videos, but editing the coloring and lighting, well, that's a whole nother story, lol!! I'm just not very good at it and frankly, it's a challenge...Good thing making them out weighs all of that! ;)  I hope you enjoy!!


I thought and though and dismissed many ideas for an Easter card video. I finally came up with this easy layout and am super excited about this one because of you being able to change it up easily by just using different patterned papers. You can see what I mean in the pictures that follow the video. Super fun + super easy = WIN WIN! I hope you give this card a try!


Cardstock measurements:
Celery - 8 1/2 X 5 1/2, 1 1/8 X 5 1/4
White - 1 1/2 X 5 1/5
Patterned Paper - 4 1/8 X 5 1/4


Here are the different cards I made. Remember, there are no limits...change up the papers, color scheme or rhinestones.

DeNami Stamps used:
Hatching Chickie Border
Happy Easter

DeNami Items Used:
celery cardstock
lavender cardstock
spring twine
boutique buttons


I just love how they all look a little different even though they are the same exact card! Amazing what a little change of paper / colors can do. I'd love to see your creation so make sure you let me know if you make one of these cuties!!

Friday I have an extra special guest posting right here on the Addict blog and a really fun announcement so be sure to stop back in!!

Hope you enjoyed my little video and thanks for stopping by!!

Monday, March 11, 2013

Embossed Chickies

Happy Monday everyone! If you're looking for my Birthday Bonanza hop card, it's just one little post down. Remember to leave a comment so that you're entered to win a wonderful prize :)


Today I have a card that just makes me happy happy happy. I really toyed with the idea of making a start to finish video for this little cutie but decided against it because I know many of you just don't do  dry embossing.  However, I did make a fun Easter card video on a different card for you ;)


Did you notice that I pulled out that gingham background yet again...I'm utterly smitten by that image, lol! How cute are these Hatching Chickies? This image is so easy to color and makes a wonderful focal point on a card. Stop back in on Wednesday for a brand new start to finish card video using this darling little stamp.

Did you know you can follow me on Facebook, YouTube & Pinterest? Well that's it for me today. I'll see you back here on Wednesday with a brand new and start to finish easy card video. Thanks for stopping by!