Showing posts with label Polka Dot Background. Show all posts

Wednesday, November 19, 2014

It's pumpkin season!!

Hi everyone, since it's pumpkin everything season I thought I'd join the band wagon, lol! But honestly, I don't like pumpkin anything...well, unless there's stamping involved ;)
How can I not like pumpkins when they're this darling?? I started out with a slightly larger than a standard A2 card base in chocolate cardstock and layered on the mustardish/orangish panel. Using a Pretty Pink Posh stitched border die I cut a piece of lime green and layered that on. I cut 3 tags (from Mama Elephant) and temporary adhered them to my work surface. I stamped polka dot background then stamped the pumpkin patch border in the center making sure it extended across all three tags then filled in the rest of the tag with a sentiment and images from the autumn and leaf accents petite four sets. After adding a little ribbon treatment to the tags, I popped them up on the card using foam tape/pop dots. I thought it still needed a little something more so I added some tiny 4mm clear sequins from Pretty Pink Posh.

I'll see ya later!! :)

Wednesday, September 17, 2014

homemade gifts...

Hey y'all, how are you today? I'm doing good, my hand is finally better and today it isn't even sore to the touch! WOO-HOO! I can't wait to break out some goodies and play the second I get a chance! My house has suffered so dusting and general cleaning is first on the list of things to do...sigh


I do however have something fun and new to show you! I wanted to wait until closer to Christmas for this because I think homemade gifts are great and this is perfect for gift giving! However, with my hand not cooperating I haven't been getting crafty so it's time to break out my "back ups", lol!


What do you think about sugar scrubs? Easy to make and with pretty little jars, perfect for gift giving, right?
I found a recipe online for this one. Just sugar, olive oil, vanilla fragrance and a drop of food coloring:


In a mixing bowl add -
1 cup sugar
1/2 cup olive oil
vanilla essential oil or cooking vanilla to reach desired aroma strength (I used Vanilla scent from the soap making section at a big box crafty store)
1 to 2 drops of food coloring to desired color

*Stir together thoroughly to incorporate all ingredients 
*divide into jars

Yup, that's it...easy!! I purchased these little jars at Michael's for $1 each and the little spoons are from little individual Blue Bunny ice-creams. The spoons already had a little hole from being attached to the underside of the lid on the little single serving tubs...it was perfect! I punched out little tags then stamped them with some DeNami goodness ;). I used the polka dot back ground then in a darker ink color stamped the decorative flourish over the top of it. I then punched a couple of circles, layered them and stamped a sentiment from the everyday petit four set and attached it to the tag. I tied the little spoon onto it then tied it to my little jar. You can't get any easier than this and it's cute to boot! 

That's it for me today, I'll see ya back here on Friday!

Friday, September 5, 2014

Baby cards with DeNami Giraffe

You gals are too sweet and I just LOVE your comments!!!! I may or may not have snickered out loud when I read the "beeeeeeeutiful" part from Lisa's comment! No judging here, you should have heard all the bee  puns we were all throwing out during the class...it was quite sad, lol! We were laughing so hard at one point that the gals couldn't even make their cards! That was a fun class! ;)  Brenda, look up your local area on craigs list or even google bee clubs (yup, most area actually have clubs!!) in such & such area. You'll be sure to find a beekeeper looking for someone to host a bee yard. 

On with today's post, I have lots to show you today. Quite a while back I was making cards to submit to magazines. Well, those days are far gone, lol, I have plenty to keep me busy what with design teams and teaching and haven't thought much about submitting at all. I guess I'm feeling content at the moment but someday, yeah, I WANT to be published!! I have a little set of cards that I made specifically for Card Maker magazine that I never showed to y'all. It's been quite a while, months and months and month to be exact, lol, and I got my thanks but no thanks letter months and months and months ago so I could have shown them off way back then. Not sure why I haven't, other than I kinda forgot about them at one point...yikes! Anyway, I think they turned out cute even if my coloring wasn't all that at the time - this was way before I started playing with Copics. I think I'd like to tackle this little cutie with Copics now ;)


I made one for a girl, a boy and a neutral one. All 3 are made the same way just changing up the colors a bit makes a big difference doesn't it? I started out with an A2 chocolate colored card base. I stamped the DeNami medium polka dot stamp on cream cardstock then stamped the smaller DeNami polka dot & teeny heart  backgrounds in Versamark on a strip of kraft. I edge punched a piece of black cardstock, layered the 2 strips then attached them to the cream panel. I tied a piece of alphabet twill ribbon around the top then attached it to the card base. I cut little random sized squares of chocolate and layered on little cream squares then stamped out letters to spell "baby". I think DeNami needs an alphabet set...hint hint, Nami, hehehe! Anyway, I then attached them to the card using foam tape/pop dots. I punched 2 tags, one black & one cream. I trimmed down the cream one and stamped on the little DeNami giraffe, colored it and added faux stitch lines. I then added a bit of twine (a super long piece) and tied it to the twill ribbon knot that I had made earlier and then added some grosgrain ribbon and a button to finish it all off. Since I used a long piece of twine I was able to really secure it all together nicely, there was plenty to tie around the twill knot and come up through the button. I added a little piece of foam tape under the tag to hold it in place and added a little bling to complete the whole card. 

Well that's it for me today, I have to run, didn't realize what time it was...ohh gosh!! I'll see y'all on Monday, have a GREAT weekend!!!

Wednesday, August 27, 2014

Pretty little gift set

Hi everyone!! This week is half over already, is it going by fast for you too?? Summer has finally landed here in the Midwest and we are seeing triple digit temps....yikes! I can't complain though, it's been one heck of a nice summer so far even if we haven't had any rain!

Well, I wanted to send someone a thank you gift for helping me out with something so I made a little card and thought I'd put a gift card of some type in it. A couple of days later I had an epiphany and decided that a gift card wasn't the way to go. We have a certain something in common....our love for a certain little drink called a Lime-a-rita. I decided to buy her a pretty little glass and a HUGE cans of Lime-a-rita, lol!  However, just any ole bag with my pretty card wouldn't look right so I decided I needed to make a matching gift bag. You can get plain white (and kraft) bags at the big box craft stores in a package but I ended up getting this one in a 4 pack at my local dollar store.

My friend's not a girly girl, definitely more tom-boy than girly.  However, I still wanted it to be feminine so I decided to make the bag and card like I normally would, but just change out the bright frilly type colors I would normally gravitate to for darker richer colors.


Here's a little close up...........


Card:
I started out with a navy blue A2 sized card base and layered on a piece of charcoal that I had stamped with DeNami's medium polka dots background (larger dots) then made a white panel using the smaller polka dot background and a couple of petit four sets. I layered that on along with a doily, and a piece of charcoal cardstock that I edge punched on both sides (to make a little band). I finished it off by adding a punched scalloped circle tag and sheer navy bow.

Bag:
For the bag I basically did the same thing as I did for the card. I did distress the bag with Momento London Fog ink to knock down the brightness a bit. I layered on some Charcoal cardstock then layered on the white panel that I had stamped with the medium polka dots background that I had used earlier along with the same butterfly and flower. I added a piece of navy cardstock to make a base for the tag and added the doily then made a tag to match everything. After I had it all put together I decided it needed more ribbon than just the bow so I carefully pulled up the tag and sides of the charcoal panel and added a length of ribbon. I was much happier with the results then. The ribbon seems like it "anchors" the focal point to the bag now.

DeNami Stamps:


Well, I actually made this set several months back, and she LOVED her little gift! Not only did the gift itself fit her but the card and bag did too. Next time you need to give a little gift why not try making a cute little matching bag too?

Wednesday, June 18, 2014

A sweet birthday treat


I'm always on the hunt for new birthday card designs.  I created this little card with a really sweet friend in mind, then decided that it just wasn't good enough and came up with a plan B, lol.


It's not that I don't like this card...I really do. I just wanted to make something just as special as my friend is for her birthday card. Maybe it's just the color palette that I used here that's throwing me off a little. I think I'll revisit this little layout in the future and see how it plays out again before kicking it to the curb ;)


Sunday, April 13, 2014

Buttons & Bows - DeNami Design April blog hop

Hi everyone...guess what, it's time for another super fun blog hop brought to us by DeNami Design!! This month's theme is Buttons & Bows!! Ohhh how I puffy heart me some buttons and bows!

In my opinion everything is better if you have a button or bow ;) but adding both is sure to be uber cuteness!!

Deets:
When: The blog hop starts on April 13, 2014 at 6 AM, PST. However, you have until April 14, 11:59 pm PST, to leave comments on all the blogs (to be eligible for a prize).

Why: To be inspired by fun DeNami Design creations and also the chance to win mini shopping sprees on the DeNami Design website!

Prizes: We are giving away THREE $20 gift certificates to our website! We'll be giving away one gift certificate to a random participant (DT members not eligible) and then we'll also be giving away TWO gift certificates to TWO people who comment along the hop!

You should have arrived here from the seriously talented Pattie Goldman's blog. I bet she had something seriously beautiful!!


All right, now that you have all the details, are you ready to see what I came up with? I really had a hard time deciding what to do. I use buttons quite a bit and ALWAYS seem to have a little bow on my cards, I'm a ribbon-a-holic, lol! I really wanted to do something different than just a normal old card for the hop and after a bit of thinking decided on a matching Easter gift set.
Mason jars are all the rage right now and what better use than for a little Easter treat? Added bonus is that your candy stays fresh, hehehehehe! ;) 
For my card I started out with a white base then layered on a piece of pink cardstock that I had stamped polka dots using the polka dot background stamp. I "colored" in a doily using Momento ink and added the patterned paper flags, tea stained seam binding bow (from Paper Sweeties) and a pretty button. For my focal image I used the darling Easter Chickie Circle (I just noticed that I forgot to color the center of my flowers...sigh!). I finished it all off with a few pieces of sequins (spring mix from Pretty Pink Posh) for a little pop. 
For my jar I used the same focal image, patterned papers and seam binding as on the card. Then added more Spring Mix sequins along with some buttons. Did you notice the little pink flowers inside my buttons and the larger white flower on my jar? That's all part of the Spring Mix...ADORABLE! 
I thought the top needed a little sumthin' sumthin' so I punched put a scallop circle and stamped a dot frame from DeNami along with the small Happy Easter sentiment (I masked the sentiment so it would stack).


Well that's all for me today...off you go now to visit with the talented Donna Bowman! I can't wait to see what she has for us!!

Monday, March 17, 2014

The Shabby Tea Room #210 - Anything Goes!!!!!

Ohh my goodness do we have a surprise for you this week at The Shabby Tea Room!! This weeks them isn't a beautiful picture or even a sketch....well, that is it could be if YOU wanted it to be....
This weeks theme: ANYTHING GOES!!!
This week we have no rules as far as what you make or include on your project...woo-hoo for free play, right?!?!? So what are you waiting for...go create!!!

Ohh wait, you wanna see what I made and of course find out who our sponsor is this week to see what prize is up for grabs don't you, lol?

Well, our sponsor is the one and only Bugaboo Stamps! They have the most ADORABLE images and I always enjoy working with them :)
With this weeks theme there's no excuse not to play along at The Shabby Tea Room!! And who knows, you may be one of the winners and score a few Bugaboo images!!


I found this little image, Birdhouse - Beehive, that reminded me of my hubby since he's a beekeeper. Because it's kind of a tall image I decided to pull out a tried and true layout that's a favorite of mine. I made a little polka dot background with one of my top 5 favorite DeNami stamps and added a fun sentiment from DeNami's Heartfelt Greetings set.


Monday, February 17, 2014

The Shabby Tea Room - baby Love

Hi everyone, how are you on this Monday...yuck...I hate Mondays!! My weekend went by WAY too fast and Monday means back to work. Why didn't I marry for money ;) hehehe!

 Anyway, today I have a special surprise, I will be having 2 posts today. This regularly scheduled post for The Shabby Tea Room AND a blog hop for a newish company I'm designing for called 3 Twenty Crafts that starts at 3:pm eastern time. Hope ya'll come back by for a visit :)

 Now then, this weeks challenge over at The Shabby Tea Room is soooo fun!! The theme is baby shower.
How pretty is this little inspiration picture?? just one rule...make a card or project with a baby theme!


Our sponsor is Creations By AR...yes, lol, I am on her Design Team too...how fun is that??? As soon as I heard this weeks theme I knew exactly which template I wanted to work with...Lil' Bear.


Creations by AR: Lil' Bear 
Paper Sweeties: Cupcakes & Sprinkles, Sending Sweet Thoughts
DeNami Design: teeny star, polka dot background, all star greetingsouter space stamp set

This little template is ment to be a non openable card...just a little bear with a stamped sentiment on the bib, however, I took it a spet further and cut out 2 bears for each one and made it into an openable card....
I scored the 2nd bear I cut from plain card stock just under the ears and attached it with my ATG tape runner then stamped another sentiment inside. Now their ready for my little twin nephew & niece that will be turning 2 right away :)


Creations by AR is all about paper crafting specializing in 3D templates, cutting files and digital images. Visit Creations by AR for inspiration!

I am pleased to offer The Shabby Tea Room participants a challenge discount of 10% off entire purchase during the week of my sponsorship.  The discount code is challenge10.

Friday, January 10, 2014

Project Corner - Folder Organizer

Hi everyone! I know that with the holidays and everything leading up to it that I've been slacking on keeping up with things around here. I'm trying my best to get everything back on track and am open to suggestions if y'all are wanting to see something in particular. ;)

Before we get to today's post, I have some fun news to tell you, I've been accepted to another design team!! I just can't believe it...I'm over the top excited! Now this isn't like The Shabby Tea Room, it's not a challenge blog with random sponsors. I'm on the design team for an actual company...Creations By AR. I was introduced to this company through The Shabby Tea Room and quickly fell in love with creating projects using Adela's easy to use templates. When she put out a call for design team members I was quick to apply!! My official first post will be on January 21st, 2014, but I thought I'd whip up a fun little project to introduce y'all to Creations By AR and to tell you about my good news.

With the new year starting many of us are trying to organize our lives and our junk so I thought a little organizational help was in order! If you're like me, you have a TON of the little dry embossing folders. They're pretty inexpensive and adorable so I end up picking a new one up quite often...then when I get home I have to find a place for it, sigh!! Problem solved - It's called a "Folder Organizer" and will hold a total of 30 dry embossing folders!!!
Cute, right? Recognize those polka dots?? Yup, my all time favorite DeNami stamp...polka dot background! After cutting my pieces I used a Versa Mark stamp pad to add yummy polka dots! The patterned paper trim pieces are all optional. There are also a few options for the base...including a darling little banner!! The skys the limit in detailing this set out, you can dress this little set up any way you want! The pink on the spines and the punched edge on the base along with all the ribbon trim are my ideas.


Now don't go thinking this is complicated, it's really not, I promise!! When you download the file it will have several versions; SVG, PDF & STUDIO along with detailed instructions in a PDF....
The instructions are pretty detailed and even have the number of sheets of paper you'll need along with the finished dimensions. If you don't have a cutting machine then you simply print out the PDF version and use the template to cut your patterned paper/cardstock. If you're using a cutting machine the instructions give you the measurements that you'll need to cut each piece. I really love that there are plenty of pictures along the way so that I can compare mine to theirs!!

Well, that's it for me today. I hope you enjoyed my little project and seriously, it was EASY. I'll see you back here on Sunday for the DeNami Design Valentine blog hop!!! :)


Friday, December 20, 2013

Merry Christmas

Hello everyone and happy Friday!! Ohh my gosh...the LAST shopping weekend before Christmas...are ya ready??? Can you believe Christmas is Wednesday???? I'm sooo not ready. Usually I am calm and collected and have things done well in advance...not so much this year and I'm in panic mode! I just have my son to shop for and it's all his fault since he won't give me a clue as to what to get him. Darn kids!!! 

With things being all willy-nilly this time of year I decided to pull a cute little card out of the Addict vault. I know what you're gonna say..."again with the Medium Pine tree??" Yup, again with the Medium Pine Tree...told ya it was one of my faves, lol!! ;)
I just LOVE making my own patterned paper and this little card is chocked full of DeNami yumminess!! For the card base I simply used the polka dot background with some Versa Mark ink. On the larger panel I used the same polka dot background stamp then stamped the berries and pine cone from the Classic Christmas stamp set. On the smaller panes I used the polka dot background again and then stamped the word "Merry" from the Merry Christmas sentiment along with the holly leaves from the Classic Christmas set I used on the other panel. It seems like I used a lot of stamps, but really, I didn't...5 stamps is all it took - medium pine, medium swirl, polka dot background, Merry Christmas sentiment & Classic Christmas. Having that little Classic Christmas petit four set made it very easy since you get 4 matching images in one little set. I couldn't live without my DeNami petit four sets!!

Well that's it for me today. Be careful out there this weekend, too many party goers and shoppers! See you on Monday :)

Wednesday, December 11, 2013

Christmas Chickies

Hi everyone :) Today I decided to pull a fave card of mine out of the archives. I wanted to show some Christmas chickie cuteness and since I wasn't feeling so well yesterday I thought it was the perfect time to dig this cutie out...
You can't get much easier than this little card. I dry embossed a red card base then layered a green, red and white panel across the upper portion. I stamped the little circle scallop then stamped the little reindeer chickie inside it. for the middle I used the darling little elf chickie and polka dot background stamp to make a little tag that I attached with foam tape. Easy peasy and great for mass production if you make a ton of Christmas cards to send out.

Monday, December 9, 2013

The Shabby Tea Room - Christmas Blessings

Hi everyone and welcome to the start of another fun challenge over at The Shabby Tea Room! If you're looking for my DeNami Design Razzle Dazzle blog hop card, it's just one little post down! Don't forget to leave comment throughout the hop to be eligible for the random drawing gift certificate prize giveaway! Now remember, if you get lost along the way, just go to the DeNami blog for the full list of participants :)

Now then, let's get along with today's post shall we? This week we are using two of my fave elements on our project...
Use: make a holiday card using Buttons & Polka Dots

Now if you've known me for any length of time you'll know how much I puffy heart love me some polka dots and how I also love to use buttons :)  Ready to see what I created??
I started out with a chocolate card base that I layered a mix of  patterned papers from a 6X6 stack along with papers and images from our sponsor for this weeks challenge. Both doileys and the music sheet flag are patterned papers from By Digital Paper. I used Christmas Baubles (ornament & greenery) & Antique paper #1 background collage. the polka dots on on the top doily is my polka dot background stamp from DeNami Design and the sentiment along with the rusty jingle bells and mint seam binding are from Paper Sweeties

By Digital Paper - an Etsy shop


That's it for me today. I hope you can play along for a chance to win some beautiful images from Janet's Etsy shop! :)

Monday, November 4, 2013

Cupcakes for everyone!!

Hello and how ya doing?? Today I have a fun little birthday card to share with you for this weeks challenge over at The Shabby Tea Room. Our sponsor this week is a little company that I just puffy heart adore....Paper Sweeties!! You've seen me use Paper Sweeties stamps quite a bit here on the blog...you know, those darling little "paper doll" stamps that you can dress up? And it's easier than ever now that they've come out with dies! Did you know that they also carry lots of other fun images besides the little dolls and outfits...banners, sentiments galore, fun shapes, alphabets and more!
 
Paper Sweeties™ LLC is owned and illustrated by Debbie Marcinkiewicz, and offers high quality, on trend acrylic stamps and metal dies. Our heartwarming images allow paper crafters to create adorable dolls with interchangeable outfits and accessories! We also have a wide variety of wonderful all-occasion sentiments, labels, frames and accessory sets - perfect for every paper crafted project! The Paper Sweeties boutique carries tea-stained seam binding too! The Sweeties dolls, accessories and sentiments are so much fun to play with and are sure to bring back fond childhood memories! You’ll enjoy using the Sweeties stamps and dies to create projects for card making, scrap booking, party invitations and favors, home decor, gifts and so much more! www.papersweeties.com Winner will receive a $20 gift certificate from the Paper Sweeties boutique!
 
Ready to see this weeks inspiration picture???
Shabby Fall Party.....


This week we're to use the following:
  • banner
  • cake or cupcake
  • orange or yellow
Pretty fun, right? Ready to see what I made.....
 
 
I started off by making my own patterned background paper by stamping the DeNami Design polka dot background in a light pink then randomly stamping the Paper Sweeties cupcake and coloring them in. I layered a digi image onto a yellow panel and fussy cut the Paper Sweeties banner after stamping it out in pink. I finished it all off with a fun Paper Sweeties sentiment, pretty flowers, a little ribbon & twine and iridescent sequins.
 
Paper Sweeties stamps used:
Celebrate set (birthday/party themed images)
Beautiful set (frames and sentiments)
 
That's it for me today, I hope you can stop by The Shabby Tea Room and play along with us! Remember, your card style need not be shabby to play!!!

Thursday, October 3, 2013

Paper Sweeties - sweet inspiration

Hi everyone!! I know it's only Thursday, but I wanted to enter the month long challenge going on at Paper Sweeties. I know it was just announced yesterday morning...but why procrastinate?? Besides, I enter this one now and then I still have a whole month to make at least one more to enter!! hehehehe There is a method to my madness ;)  Also, there's another little challenge that I want to enter. Thanks to Paper Sweeties, I found  a little company that has the PERFECT little organization tool for ribbon! I'd never heard of them or knew such a thing existed until I saw it on the Paper Sweeties blog..how cool!! It's called a ribbon carousel and is by the Ribbon Carousel Company. They sponsor a challenge on their blog randomly picking a winner for one of their carousels...Woo-Hoo!!
 
Ribbon Carousel's theme: Fall & Halloween creations!!!
 
 
Usually Paper Sweeties offers us a sketch to work with, but this month they changed it up and gave us an inspiration picture along with some beautiful fall colors......


I puffy heart this....just sayin'
 
Here's my take on the adorable inspiration....


I decided to pull out the Emma stamp along with her little Sweet Cuts die and go from there. I stamped and fussy cut the wagon from the Sweeties Wagon set then decided on the outfit that I wanted her to wear...the dress from Jelly Bean Time. After I fussy cut her dress from patterned paper I decided I wanted to add a fun element like tulle. Unfortunately I didn't have anything that matched! I did however something that with a lot of tedious work that would...see the little velvet strip on her dress, well, that's part of some ribbon I have and it has the frilly sheer part on either side of it. For the first layer I simply cut the sheer part from one side then glued it onto the dress. To finish the rest of the dress I cut the sheer part from both sides of the velvet and started filling in her dress with the little strips. 


A toothpick, pair of tweezers some Chrystal Lacquer and a few choice words later, I had her dress completed...whew! I pulled out some fun fall patterned papers and started layering. I opted for an easy layout so that little Emma would stand out. Earlier I had made a little tag using the Borders set from Paper Sweeties along with the DeNami Polka Dot Background and the Thoughtful Greetings set. But no matter how I tried to attach it I just wasn't happy. I finally decided that "simple is best" and left it like this...unfinished.
 
Well I hope y'all like her as much as I do :)   See ya here tomorrow with a fun little Halloween project!!

Friday, September 20, 2013

The Project Corner - Kraft Gift Boxes


Hello and HAPPY FRIDAY everyone :) Today I have a fun little project to share with you. Last month a sweet friend of mine had a birthday and as part of her gift I wanted to include some buttons and other little doo-dads but wanted to dress them up a little. Who wants ugly packaging....right?? I had already made a little gift bag (can bee seen here) and little baubles would just fall out so I needed something else. I had decided to use a little cellophane bag with a  pretty ribbon treatment and when I went to get a bag from my stash, I saw this....
 

Yup, we've all seen these cheap (usually just a buck) kraft boxes in various shapes and sizes in the big box crafty stores and many of us have even purchased a few with "good intentions". There it was, staring me in the face and I had a light bulb moment! It's PERFECT to hold little bits & baubles!! Now the hard part...what the heck to do to jazz it up!!
 
 
Well, I knew her crafty space was made up of  soft girly colors so pulled out some stamps, patterned papers, cardstock, ribbon and assorted doo-dads that would match then got busy!!
 

  •  I started off with a piece of celery cardstock cut to size to fit around the base of the box and stamped the DeNami Gingham background on it, then edge punched it. I attached it using my ATG
  • Next I marked where the bottom edge of the lid came to and using Chrystal Lacquer, I attached the gathered tulle skirt. (was purchased this way in the ribbon dept at Hobby Lobby)
  • Using another edge punch, I punched out a little piece of pink cardstock for a trim accent (zig-zag) and adhered it with Chrystal Lacquer
  • to finish off the base I made a little green bow. Using a brad, I attached the bow through the front of the box


Now it's time to work on the lid....
  • I cut a piece of celery cardstock just a bit smaller than the lid stamped it using the gingham background again then punched the corners and adhered it
  • I had some patterned paper with little rulers all over it so I cut them out and glued them around the lid. I made sure to use several different ones for a more eclectic look. To cover the seams and for a little fun element, I attached a few pretty buttons
I had a hard time deciding what to do to finish the lid, After much thought and sleeping on it, I decided to go with this....
  • using the same gathered tulle I used on the bottom of the box, I made a little rosette. I secured the top and underside of the rosette with a punched scalloped circle
  • I stamped and fussy cut some solid leaf vines and solid leaf sprigs. After a little fussing with where I wanted them, attached them to the underside of the rosette
  • next I made a little sentiment flag. I cut one from the celery and a little smaller one from white cardstocks. I stamped the white flag using the DeNami polka dot background then stamped the Hugs & Kisses sentiment. After deciding where I wanted it, I adhered it to the backside of the rosette too
  • using Chrystal lacquer, I attached the whole thing to the top of the box
  • to finish it off I added one more button with a little twine bow
 
     Well there you have it...a pretty box made for next to nothing! $.99 for the box, $0 for scraps of cardstock, $.35 for patterned paper, $0 for ribbon scrap, $0 for buttons in stash and $2.00 for gathered tulle. That's less than $3.50!! AND it's perfect to hold little bits and bobs.  Now I need to make one for myself!!
     
    I'll see you right back here on Monday :) Have a great weekend!!!

Wednesday, September 4, 2013

I'm going to the chapel and I'm gonna get married...

I litterly DID go to the chapel to get married...The Little White Chapel in Vegas to be exact, lol!! Hubby and I are pretty easy going for the most part, but when you have a mother trying to run things and 2 sisters saying they should be the Maid of Honor, well, sometimes it's easier to just run a way....  ;)
 
What you're about to read comes as no surprise to me, it's how my life usually goes....
 
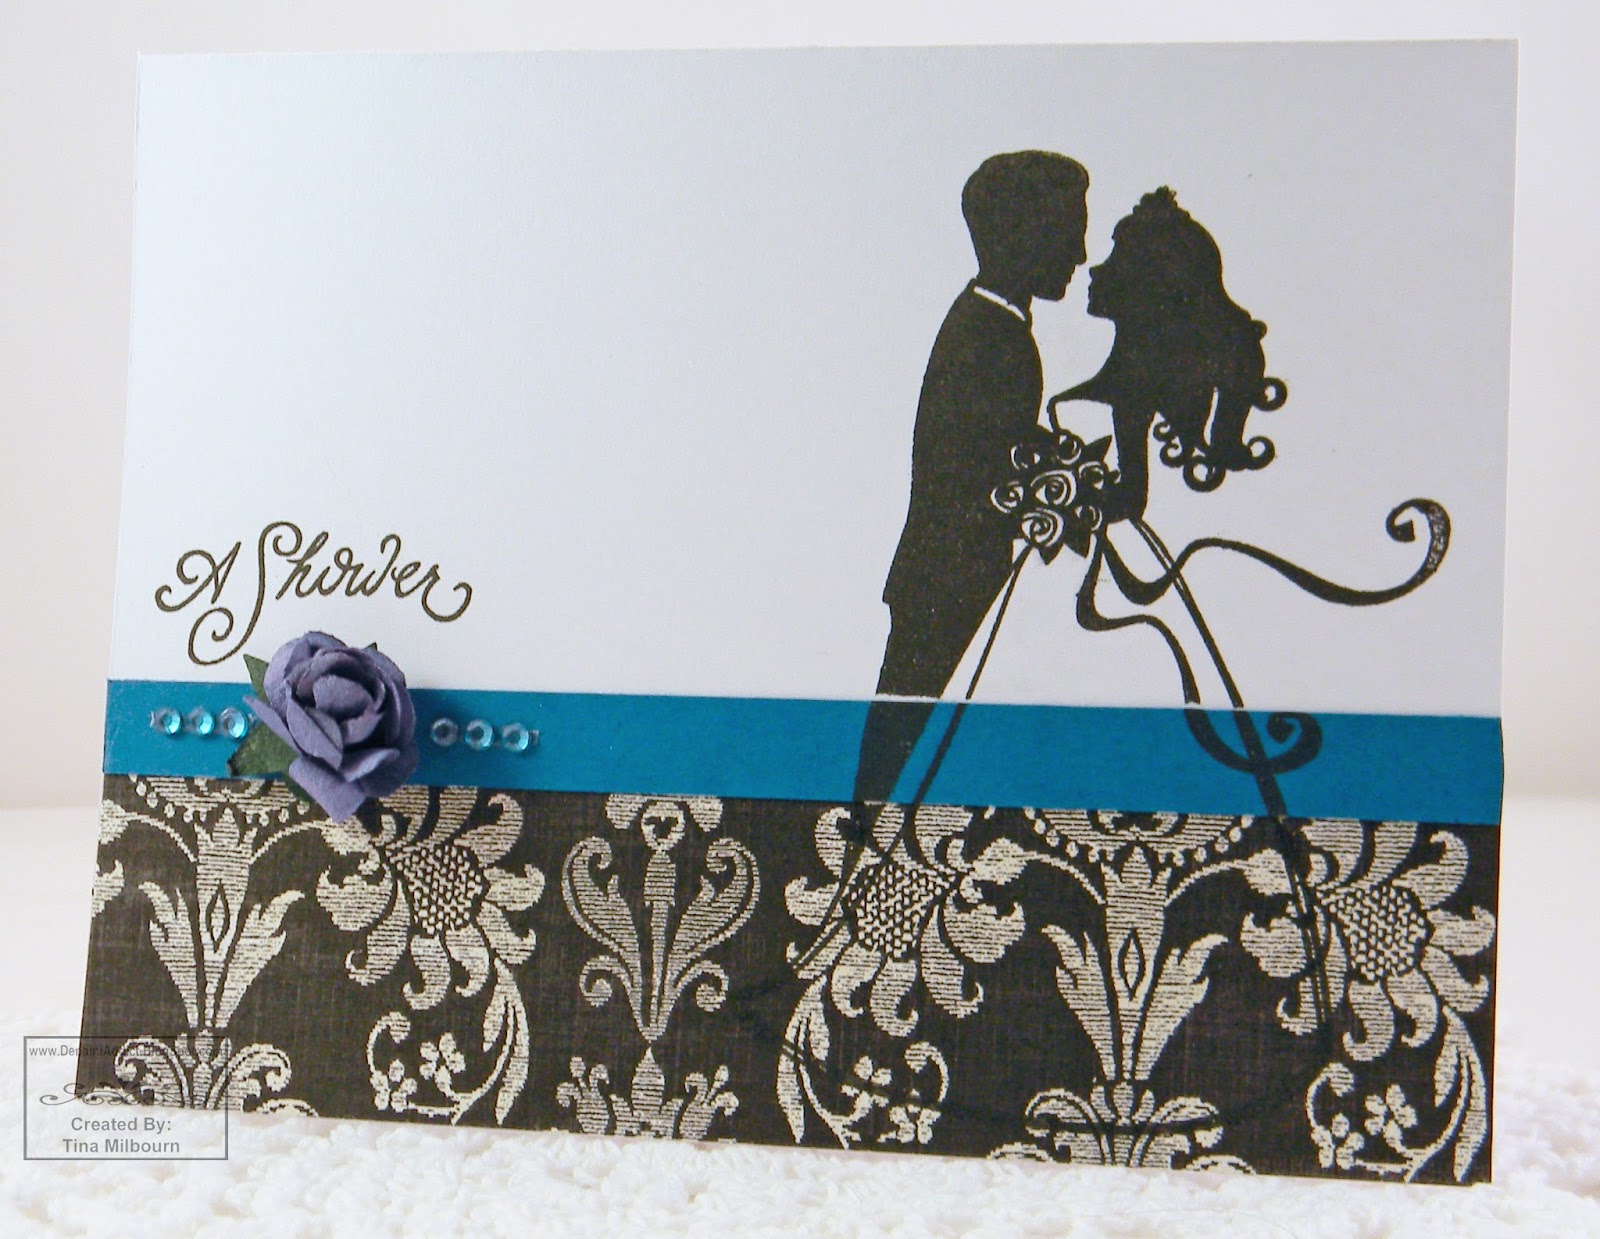
My son's fiance' sends me a text saying that her older sister is getting married in October and her mom wants to know if I could make shower invitations. I grudgingly reply "yes", and that I'd do them for material costs as a favor since we are practically family. I then ask all the pertinent questions concerning colors, theme, what exactly are they looking for. All I get is "her colors are peacock". (insert me shaking my head here)...sigh. I take a deep breath and suck it up and start thinking - okay, purples, blues, lime green and maybe a little charcoal or black to make it all pop. I can do do this, I got this...not a problem, I tell myself. I ask again if they have any ideas on what they'd like; cute, elegant, formal, trendy, fun...when really, all I want to do at this point is shout - "give me a freaking clue!!", lol! S. I. G. H!!!! They had no clue what they wanted and time is ticking away!
 
So, I made up a few sample shower cards and met up for lunch with my soon to be DIL and her Mom - nope, the bride to be wasn't even there, what the heck??!!??


I thought I had a good mix and even threw in a peacock feathered creation. Unfortunately they were all shot down. The Mom didn't like any of them...sigh. I told her once again that I had to have some idea on where to start as the possibilities were endless, I HAD to have some sort of idea on what they wanted besides colors. Well, that was a few weeks ago and I just sat the whole thing aside, I wasn't going to waste my time trying to come up with anything else
 
Then about a week ago I get a text from my soon to be DIL asking if I knew how to emboss. I replied heat & dry, I could do both. Lol, her response "???"! So I scoured the blog for an example of each, screen captured them, cropped the pic so only the card was showing, then texted them to her. Why do I go through all the work...uggg! She passed them alon to her mom. Insert crickets....didn't hear anything for almost another week. Then this past Friday I receive a text & pic from the Mom with a picture she got from the Michael's web site asking if I could make this card...
 
sample from Michael's website


I told her that I didn't own the stamps they used, I had the feather that I had shown to her previously and that I didn't have anything like the stamp they used for the background. I also told her that punching holes in the strip for the brads was a waste of time, I'd just add rhinestones instead. I whipped up a sample and texted her a pic...she LOVED it!

 Well, here's my version.....
I used an old Stampin' Up "lace" background and the large feather from the DeNami Peacock Feather set. Honestly, this does not look like a wedding shower card to me, but hey, if they like it, than that's all that counts because I finally have a design to work with!!
 
 I figure out the total cost (materials only - in paper, ink, adhesive, stamp cleaner, etc.) for 30 cards would be and text the mom to let her know and see if she still wants to do it. She asks if I have the supplies and I tell here that no, I don't have that much card stock, I would need a pack of black, white and need 18 sheets of open stock blue nor do I have enough embossing powder and would probably need to pick up a refill for my adhesive tool also. She says okay, how about if I give you half the money now? (insert blank stare here) -.- Seriously???? I'm doing her a favor, she needs them right away and she wants me to put up my own money to make the cards??? I'm feeling pretty darn insulted at that point and wouldn't be surprised if I had steam comming out of my ears! In my mind I'm running scenarios like...what, she thinks I'm going to steal her $60 and leave the country -or- does she think that I'm lying, that it shouldn't cost $2  a card and I'll never see the other half?? Anyone have any good ideas on how to slit your own wrists???? Sigh....   Again, I have no choice really, so I say yeah, that's fine. We discussed that I'd have them done over the weekend. My soon to be DIL gets wind of it and texts me that she will cover the other half, that it isn't right. I don't want her involved or to get into hot water with her mom so I tell her that no, I won't take her money. God love her, she put up a good fight, but me being the Mom-in-Law told her that I would kick her butt and she needed to respect my authority, lol! So on Saturday morning I went to Michael's for the supplies I needed. Got home and started working...Saturday passed then Sunday passed and no word from the Mom yet, I'm waiting for the 1/2 down she promised me. Late Monday morning I had them finished and texted the Mom letting her know they were ready. Her reply... "wow, that was fast". Fast?? She know I'd have them done on Monday...sigh. Insert crickets chirping again...I haven't heard another word from her...sigh!!! I seriously need a margarita (or 2 or 3)!!!
 
I'm calling my soon to be DIL today and telling her to come pick the cards up. I'm finished with the whole thing. Chalk it up to a $60 life lesson learned and just let the whole thing go. Sometimes I hate the fact that I'm a nice person when really I wish I was a bitch....just sayin.