Showing posts with label mini polka dot background. Show all posts

Tuesday, February 11, 2014

Creations By AR - Feb 2014 blog hop - "It's all about baby"

Hi everyone! Are you ready for another fun hop showing off all the new pretty templates at Creations By AR?? I have to admit that I don't know a soul that's having a baby!! How disappointing, right? Well I still had a wonderful time making these cute little templates...who needs a new baby to make some cute little goodies like these???


There are 3 templates in total and the best part...YOU get to choose weather you want to make them for a boy or girl...how cool is that?? Let's get started showing you what I made....


How cute is this little bag??? I just love this little template and it was SUPER easy to boot! If you choose to make it for a girl you cut out a little collar along with puffy sleeves and it has a rocking horse option vs. the little pocket. I cut 2 pockets (stamped with a polka dot background) so I could have a little one (well, half of one, lol) on the pants leg for a cargo jumper look. Then I added some cute little stars, buttons and a DeNami Design sentiment to finish it all off.

"Rockin' Horse Card"
And how cute is this little rocking horse card?? So many options here too since the mane, tail and body are all separate so that you can easily use several papers. Best part...I only used pieces of scrap to make him!!!

"Rockin' Cradle"
This last template is perfect for taking a little treat to Mom in the hospital / when she gets home or as a table decoration for a shower....just fill it with candy or some little booties. I chose to make mine from plain cardstock with a couple of pieces of patterned paper accents so that I could use one of my favorite DeNami Design stamps to decorate it with.

Tina Milbourn <------------- you are here

Well that's it for me today. Now don't forget to hop along with the other designers and leave comments so that you can have a chance to win any one of the three sets! Also, as a little bonus if you'd like to purchase all 3 templates there is a little discount! You can get the baby bundle for only $12.00.

Sunday, February 9, 2014

DeNami Polka Dot hop - Feb 2014

Hello everyone and welcome to another fun and inspiration filled blog hop brought to you by DeNami Design (the bestest stamp company in the world...hehehe)! As you know, today's theme is POLKA DOTS...SWOON! Y'all know how much I LOVE me some yummlicious polka dots!!!
Okay, before I show you what I made let's go over the details for your chance to win a DeNami Design gift certificate!

When: The blog hop starts on February 9, 2014 at 6 AM, PST. However, you have until February 10, 11:59 pm PST, to leave comments on all the blogs (to be eligible for a prize).Why: To be inspired by fun DeNami Design creations and also the chance to win mini shopping sprees on the DeNami Design website!

Prizes: We are giving away THREE $20 gift certificates to our website! We'll be giving away one gift certificate to a random participant (DT members not eligible) and then we'll also be giving away TWO gift certificates to TWO people who comment along the hop!
 Okay then, let's get started :)  You should have arrived here from the very talented Greta Hess' blog. If not, no worries, hop on over to the DeNami blog for the full list of participants!


Ready to see what I made????
For my first card I thought I'd go with a traditional way of using polka dots and brought out my beloved and coveted polka dot background stamp...yeah, like y'all thought I wouldn't right, hehehehe! ;) Poor stamp is about worn down to a nub at this point, lol! I paired it up with the pretty rosette and a brand new sentiment. This card was SUPER easy to make and comes together very quickly...a must have layout in anyone's collection for any occasion.


Now this card I decided to change up and show y'all how to use polka dots in a totally different way and boy are there a LOT of polka dots. I used an embossing folder to create a subtle polka dot background. Then on a strip of card stock I randomly stamped the little pansy cluster from the new summer flower accent set (love the little polka dots mixed in the flowers) then filled in the rest of the strip with the new small pansy. I finished off this polka dot extravaganza with 3 little butterflies made up out of tiny little polka dots from the darling decorative butterflies stamp set. The sentiment I used came from my fave set...all occasion sentiment set.

Well, that's it for me. Now off you go to visit with an uberly talented gal, Pattie Goldman. Hope you have a great day and I'll see you tomorrow with a fun new challenge for The Shabby Tea Room!


Thursday, August 1, 2013

For Your New Baby....

Heya everyone, surprised to see me today??? Well, I have some fun news to share with you. I was invited to guest design/participate in 3 blog hops to celebrate Paper Sweeties stamp company's 1st birthday that takes place this Friday, Saturday and Sunday! Ya'll have seen me use their stamps before...the darling little paper doll stamps with the fun little outfits to dress them in, little banners and who can forget that yummy seam binding! For a prize they are giving away their entire August release!!!! Hmmm, is it too late to back out so that I could be eligible to win...dang! ;) I've heard little hints about it and saw one little hint on their Facebook page...YUMMY new images!!
 
I have 2 challenges I wanted to enter so I thought I'd better post it today because I think Monday is too late for both of them...well one of them for sure. My week has been totally thrown off due to personal family issues (nothing bad) being dealt with...I'm way off with what I'm needing to do and dates this week!
 
For The Shabby Tea Room we were supposed to make a baby themed card and were given this little inspiration picture...
 
The directions said our card could be for either a boy or girl, but I decided I wanted to make more of a monochromatic gender neutral card.

For the challenge over at Jo's Scrap Shack they are calling for us to "Bling It Up". Now ya'll know I love me some bling...this is an easy peasy theme!
 
 
I started out distressing a kraft A2 sized card base and smaller panel with Tim Holtz tea stain distress ink. Then using white ink I stamped the DeNami polka dot background and some pretty flowers (in lieu of lace since I have no lace stamps or lace handy to "ink over") from a random set of stamps I have. I layered some cream and kraft punched circles that I had distressed with the same ink as the base & panel. After a little creative stamping I got my little elephant facing the proper way and randomly stamped him with the brand new DeNami paisley stamp. For my little flag I used a sentiment from Paper Sweeties Sending Springtime set. It originally said "for your new nest" but again, I used a little creative stamping. ;)  There's a sweet little bunting border stamp under the DeNami "baby" sentiment...not sure who that's by either. I finished it all off with some rich chocolate sparkly ribbon and 2 shades of fibers before adding 3 different style of roses (cloth (with a giant rhinestone), paper & resin). I wanted to add tiny rhinestones to the stamped flower centers but got to thinking that it may be too distracting so I left them off. I'm still being all wishy washy about it!
 
Blogger Note: I decided to add that extra bling and am happy I did...love the results! This is the version that I will enter into the 2 challenges. What an improvement a little touch like tiny blings can make :)


That's it for me today, hope you like my little elephant :) and don't forget to stop back by for the next 3 days for 3 separate blog hops! I'll have the full list of participants on each of my posts so that you can join in and the deets for winning the entire Paper Sweeties August stamp release!!!

Sunday, May 19, 2013

Fresh Florals blog hop

Well hello and welcome to another fun DeNami blog hop!!With spring in full bloom, Paulina thought we should show off some pretty little flowers this month....

When: The blog hop starts on May 19th at 6 AM, PST. However, you have until May 20th, 2013, 11:59 pm PST, to leave comments on all the blogs (to be eligible for a prize).
Why: To be inspired by fun DeNami Design creations and also the chance to win mini shopping sprees on the DeNami Design website! 
Prizes: They are giving away THREE $20 gift certificates to their website! One gift certificate to a random participant (DT members not eligible) and then TWO gift certificates to TWO people who comment along the hop! 
You should have arrived here from Deb's blog. If not, no worries, just head back to the DeNami blog for the full list of participants to get back on track.
When I saw this theme I decided right off that I didn't want to make a regular ole card. I mean, I do that all the time, right? So after a little thinking, I decided how fun it would be to make flower seed packets!

Here's what I came up with....
 Aren't these adorable? I found the template for the two small packets on the Internet and the larger one I drew in the Paint program on my computer. Just add a little ribbon or washi to the little planter boxes and these would be cute little gifts or place settings for a garden party. For the one on the right, I plan on tucking in bible verses for a few friends.

I had so much fun creating these little packets that I wanted to see if I could come up with a card using one....

And for a little surprise....
The seed packet is removable and the card is still adorable because there's a matching panel under it.


That's all I have for you today, it's time for you to go visit with Jennifer Harris
Remember to leave comments along the way to be eligible for the random drawing for the two gift certificates :)


Wednesday, May 8, 2013

Spring Showers

If you follow the uber awesome Paulina on her personal blog, Pretty pink Posh, then you know of her puffy heart love for sequins. After seeing some amazing creations using her beloved sequins, I just had to have some of my own. She purchased her's from Ellen Hutson (link on bottom right of her blog) so that's where I went for some blingie goodness. Unfortunately they were sold out of several colors I wanted but I did manage to pick up a few beautiful colors. The pictures do not do the colors justice, they are sooo pretty!! I was talking to Paulina about buying some sequins but not being able to get all the colors I had wanted and true to her sweet self, Paulina shared some of hers with me! Isn't she awesome???

When I saw the blue sequins I instantly had a vision of what I wanted to do with them. It's not often that what I plan in my mind works so perfectly on paper, but this one sure did....


 I can certainly see why she's addicted and truth be told, I'm seriously addicted now too! ;)

That's it for me today, thanks for stopping by!!!

Wednesday, March 6, 2013

Large Irish Chickie

Ohh my goodness, I was soooo happy to have an excuse to FINALLY pull out this large Chickie and dress him up in his new clothing!! He's cute enough to be on the cover of GQ ;)


I played around quite a bit with a layout for him, not so sure I'm 100% happy with this one, but it's kinda cute and lets him be my main focal point. I can't wait to play with this Chickie and all the fun accessories again soon! Notice that gingham background peeking out yet again...I told ya, I just can't get enough of that fab stamp!! ;)
 
 
Thanks for stopping by!


Friday, January 25, 2013

Craft Dashes & Birthdays

Ohh my goodness, I can not begin to tell you how excited I am!! I'm feeling loads better, not 100%, but BETTER and on my way. With my physical health improving, I've been able to get busy and made LOADS of fun Valentines Day cards for you, so many in fact that you are going to have to put up with "bonus posts" until Valentines Day is over. So for the next couple of weeks look for posts on Tuesday's & Thursdays ;)   I've also managed to create a little something for a challenge too. Gosh, I can't remember the last time I was able to enter a challenge...it's been MONTHS! :(   I hope to be able to get back into the groove soon, but for right now I'm going to take it easy and limit myself.
 
Did you get a chance to watch my very first start to finish card tutorial in Wednesday's post? I was way nervous. Making a tutorial is one thing, but a video...ohh my! Well, hope you liked it and I think I'll be trying my hand at that again soon.
 
Well, this post has gotten to be a novel so I better just get to the challenge info and the card! ;)  I needed to make a birthday card for my Mom and I thought to combine it with the fun challenge over on Pretty Pink Posh....

Here's my creation....

Before starting, I doodled my idea on a piece of scrap, pulled out a few items and stamped / fussy cut my flower. I didn't color the flower until the timer started ;)

What my desk looked liked when all was said and done, lol.

And my finished card, in 9 minutes, 43 seconds :)
I wanted to make polka dots in the upper corner and thought about stamping them but when I was doodling my design out I realized that Washi would be perfect. I used 3 strips of grey washi and then overlayed a piece of pink in the middle. Gotta love that stuff! I hadn't pre planned on it, but ended up raising the main focal panel up on foam tape and I also used foam tape to attach my flower (lost time pulling out the foam tape...jeeze). I love everything about this little creation...polka dots, new DeNami images and Washi (that has polka dots!!). Hmm, thinking this would make a better card for me than my mom, lol! ;)
 
That's it for me today, I'll see you on Monday with a very informative Tips & Tricks post on a product that's taken over the crafty world. I'll be talking about the product and it's many uses and have many pictures of what I've done with it. There's even going to be a small give-a-way! Thanks for stopping by!!
 

Thursday, December 20, 2012

Classic Christmas...

I wasn't to sure how this card was going to turn out as I was trying to come up with a new layout. But in the end, it makes me smile, and we all know that that's what counts. It's very rare that I make a card on the fly without any forethought and comes out so perfect in my eyes. Hope you like it too :)


So whatcha think? I just had to have me some polka dots, lol. I started out by pulling out the green and lime cardstocks then realized I needed a 3rd neutral color and decided on kraft...kraft goes with everything! I just love that medium pine image. I purchased it last year along with the 3 stamps that you can lay over the top (this swirl line, stars and a mix of the stars and swirl). It's simply a beautiful little stamp.
 
PS: the medium tree swirl and medium star tree are on clearance....just sayin' ;)
 
 
Thanks for stopping by!


Wednesday, December 19, 2012

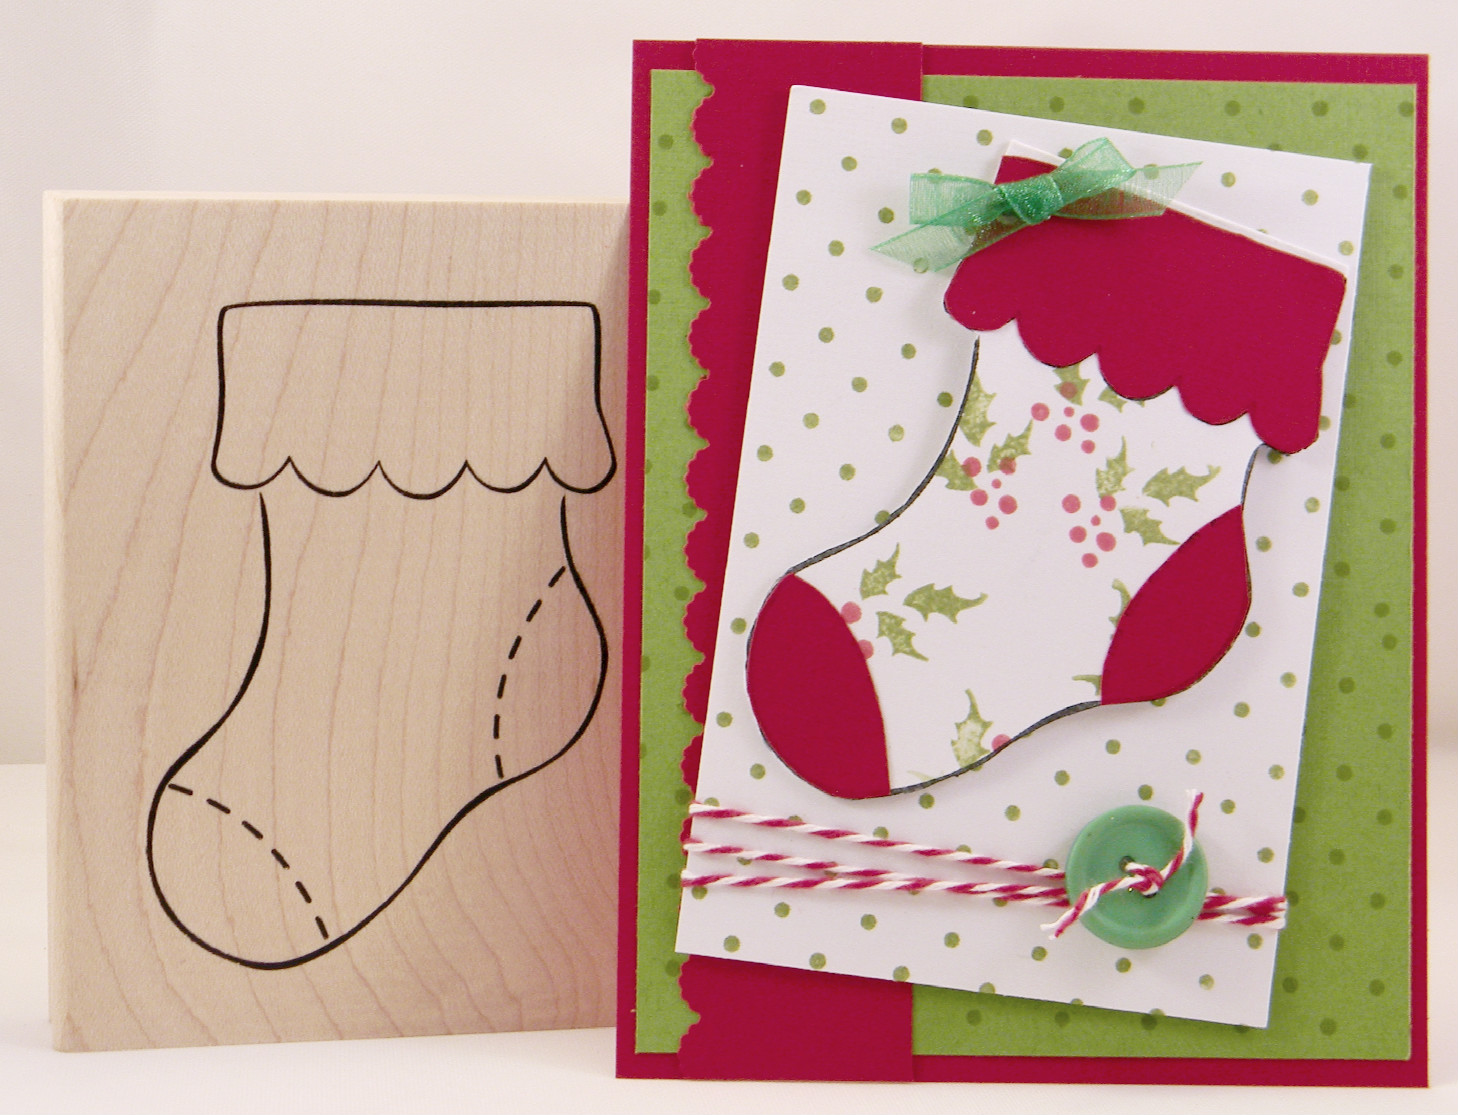
Christmas stockings

Are you ready to see a fun little idea I've come up with? I'm super excited to share this with all of you!!
 
I decided that I wanted to make something a little different and when i was making a few tags for presents I had a little light bulb moment ;)  And hey, at my age they just aren't all that often so I was over the top excited to start playing with the idea! Hehehehehe
 

 We all pretty much stick to the standard A2 sized card, but who says it has to open like a normal card....


I started off with an single layer of A2 sized cardstock and added the green, punched and white layers like I would on a normal card front. Then I made a hinged stocking and added my sentiment on the inside. It still fits inside my normal envelopes but is different and a little more fun.


Thanks for stopping by!


Monday, December 10, 2012

Whimsical Christmas Wishes

This little creation has to be my favorite of all the cards I've made this season...Gonna have a very hard time sending it out. It just may have to stay ;)


Who would have thought pink and lime for Christmas? I love using non-traditional colors on my Holiday cards. I used several different stamps: Christmas Wishes sentiment, Whimsical Christmas set, Mini Ornaments stamp set, Small Dot Border and Polka Dot Background. Believe it or not, I was able to just eyeball all of this, I didn't use my Stampin-ma-jig at all. Adding all of the glitter was so simple because I used my Quickie Glue Pen. I just love how I can glitter the thin lines and tiny spots because of that little pen, it's one tool I just can't live without! I'm sooo thankful for Paulina for introducing all of us to it :)
 
Thanks for stopping by!
 

Wednesday, August 1, 2012

Summer butterfly

I was having such a good time with that sketch from Retro Sketchs' challenge, I just couldn't resist one more entry. I went a whole new direction with this little creation!


I chose some bright summery colors. That Iridescent Aquamarine adds just the right touch with the vibrant Magenta and Leaf Green. I just super puffy heart polka dots...can one ever go wrong with them?? DeNami sure has the polka dots covered, for this card I used 4 separate polka dot patterns! Sigh, no wonder I heart them so....

Thanks for stopping by!


Friday, April 27, 2012

New look, blinkies, butterflies & bookmarks......

I have a super cool post for ya'll toady, but before I get to that, did you notice all the changes to our little blog? We had a little spring cleaning done by none other than the most talented duo ever, Paulina and Beka from DeNami Design!! I'm so loving the new look...still can't believe how darling it is...they ROCK! And not only that, look up at the top...see that blinkie tab...yup that's the one, when you click on it, you can grab a code for a super special blinkie that they created just for all of us addicts!! Those gals really out did themselves didn't they?


So, not long ago I acquired a few different sizes of the DeNami cellophane treat bags. I knew I wanted to do something different than just adding a few treats and making the same ole topper that I've done before. I have been doing a lot of thinking and during one of my brainstorming sessions, I slipped a piece of paper into a 2 X 3 1/8 bag and all of the sudden a great idea hit me....an interactive card! How fun would it be to make a removable bookmark? Now the recipient can have a little keepsake as well as a lovely card. I mean, even in this day and age of e-readers we still need bookmarks. I can't live without my Nook, but I still tend to use bookmarks all the time.

And with the bookmark removed...
If the pattern on the bookmark and back panel looks a little familiar, it is! I just loved how Paulina made this little card and have been wanting to recreate it for some time now. Doesn't it look like the butterflies are flying through  puffy clouds?

EDITED NOTE:
A funny thing about this little post today is that it kinda co-insides with todays DeNami Design blog post. The super talented DT member, Emily, has a photo tutorial showcasing the use of regular old colored pencils on our cards and getting that soft blended effect using mineral spirits. If you take a close look at my butterflies...that's exactly what I did (I used Rose-Art pencils). Colored pencils are inexpensive and come in a myriad of beautiful colors. Make sure you head over to the DeNami blog to check out her photo tutorial and I hope you give this fun technique a try!!

Please leave me a comment and let me know what you think....good or bad....or even better - what would you have done differently??...crafty minds wanna know!

Thursday, March 29, 2012

Mimi and polkadots...

I think out of the whole Mimi collection, this has to be my favorite image...it was also my very first Mimi stamp of course!

Along with using my fave Mimi, I pulled out my fave color combo too...green, pink and chocolate :)  Wow, this card is made of all my favorite things...polka dots and the scalloped border stamp too!! How's a girl supposed to give it away???

Please leave me a comment and let me know what you think....good or bad....or even better - what would you have done differently??...crafty minds wanna know!

Thursday, March 8, 2012

To keep or not to keep....

Does it get any better than pink glittery flowers and polka dots? If you say "no", then this is the card for you...


I added magenta glitter to the daises and strawberry freeze glitter to the butterflies. I'm tellin' y'all, it doesn't get any easier than using the quickie glue pen, it really helps with tiny lines since it's basically an ink pen...LOVE LOVE LOVE that glue pen!

I made this for my niece, Mandy's birthday and just love how it turned out! I have some french message boards hanging in my crafty area (Wendy's BRILLIANT idea) where I keep cards that I just can't bring myself to give away...thinking I want to add this little cutie. Poor Mandy, she's so mistreated! ;)  She knows her Auntie Tina loves her...even if she doesn't get this sparkle-riffic card!

Please leave me a comment and let me know what you think....good or bad....or even better - what would you have done differently??...crafty minds wanna know!

Thursday, February 9, 2012

One Big Chick

I've had this guy for quite a while...just never could figure out what to do with it. I decided it was time...good or bad, I was going to make a card with my "overly fluffy" chickie!!

Please leave me a comment and let me know what you think....good or bad....or even better - what would you have done differently??...crafty minds wanna know!

Friday, February 3, 2012

Baby photo Album

Well I'm back again with a little something different....

As most of you know (from following this blog) my Sister-in-law is having twins. I came across a really cool chip board photo album by Bo Bunny and thought I could make her a album that's truly different.  I added some patterned papers, then took my foam brush thingie I use with distress inks and distressed them using Vintage Sepia Versa Fine ink (my fave ink). I added touches of DeNami all through out the book using the same ink, I'm really liking the stamping on pattern paper...quite different.


Can you spot all the DeNami in this book? I used basic background stamps...polka dots, stars and hearts on some pages and on others I added the sheep, turtles, elephant and the ohhh so adorable giraffe. I even managed to get the heart scalloped border in there lol. I started the book out with her first ultrasound picture and filled the rest of the book with mats so she can add more photos.

Please leave me a comment and let me know what you think....good or bad....or even better - what would you have done differently??...crafty minds wanna know!