
A couple of weeks ago we let you know about some of the upcoming changes and new things we were going to do here on the DeNami Addict blog. One of the fun new things we are doing is a monthly tips and tricks segment where we discuss a little trick we've discovered, an easier way we've learned to do something or other interesting topic. If there's a topic you'd like to learn more about just send us an e-mail (DenamiAddict@yahoo.com). You never know, we could feature it right here in this segment.

I'd like to welcome you to our first little Tips & Tricks post. Today I'd like to discuss how I get the most from my sentiments. Weather a sentiment is too long or you're wanting it a little "less wordy", with a little simple masking, you can change up your sentiments and make them fit your card design. Below are 2 examples of how you can change up your sentiments.
For both examples below I used these products:

Here's an example of how I used a portion of the new Happy Mother's Day stamp. You may remember this card from the DeNami Design Pastel's blog hop...
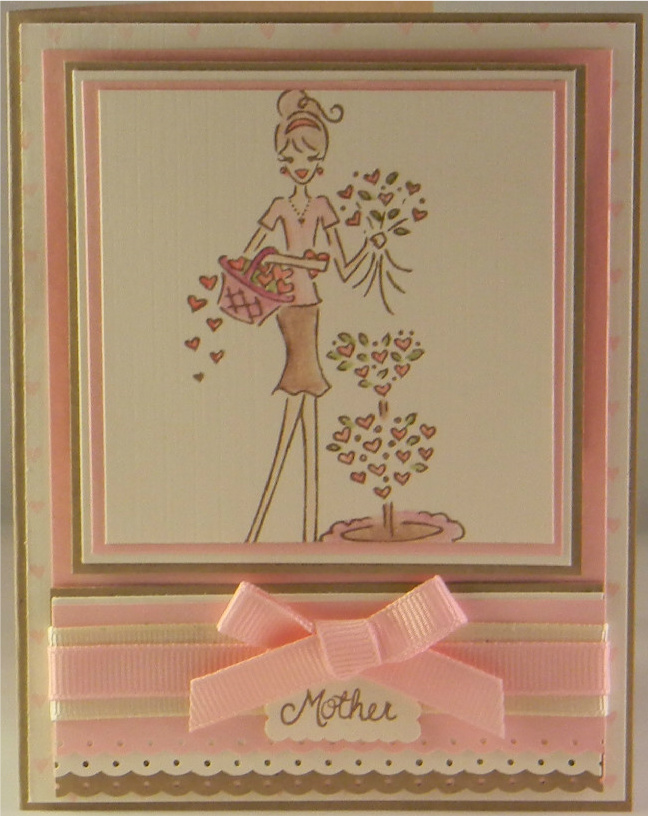

By simply placing a piece of clear tape on my stamp where I didn't want ink before inking up my stamp I was able to shorten this sentiment to fit my card.

I pulled the tape off, checked for stray ink and stamped the image
As a side note, be careful when you remove the tape. It's easy to get ink on your fingers and ruin your project. Trust me...been there, done that ;) I keep baby wipes handy for inky fingers.
See how easy that was? Now let me show you how I take a sentiment that's "stacked" and change it to fit side by side. You may remember this card from the February DeNami sketch challenge.

Here's how I did it...

I started out stamping the full sentiment on my transparent sheet

I masked off and inked the stamp like I did in the first example. Then stamped the image where I needed it.

I then masked off the word "with" and using my Stamp-a-ma-jig figured out the placement for the second word

Easy peasy isn't it. I hope you give it a try and if you do I'd love to see what you created!! Leave me a comment or feel free to upload it to our Facebook page.
I hope you enjoyed this little segment. Remember, if you have something you'd like to see, just drop us an e-mail!
I hope you haven't forgotten about our ongoing "garden" challenge that's being sponsored by DeNami Design! You still have time to enter and remember, you don't have to use a DeNami stamp on your entry...just follow one simple rule, stick to the theme of "garden". I hope you can join us! Also, today is the first Monday of the month and we all know what that means, the new challenge is being announced over at DeNami Design, hope to see you there too!
I will see you back here on Wednesday with a new card, but until then...have a great day!

That's a great trick, Tina!! I love your creative solution. :)
ReplyDeleteI've been using Marvy Brush Markers or those cute little tear shaped ink pads to stamp out just what I want. I'll try the tape too!
ReplyDeleteI wonder if using a transparent sheet would have helped me out with this card:
http://sweetheartsandsweettarts.blogspot.com/2012/05/birthday-girls.html
I combined two sentiments into one and it was a huge frustration to get it just right! If I ever have the time to attempt doing something like that again, I'll try the transparent sheet! Thanks for the tips!